Computer Applications
Project 1
This project involves completion of basic form and external model of a selected architectural design. The completed 3D model is meant to reflect the knowledge of using the software to create 3D geometries. 3D models were assessed on the overall detail, complexity and creativity used in the creation and development process.
Modeling process via Rhinoceros and 3DS Max
Click on the images to see detailed description

Studio 2 Final Project.
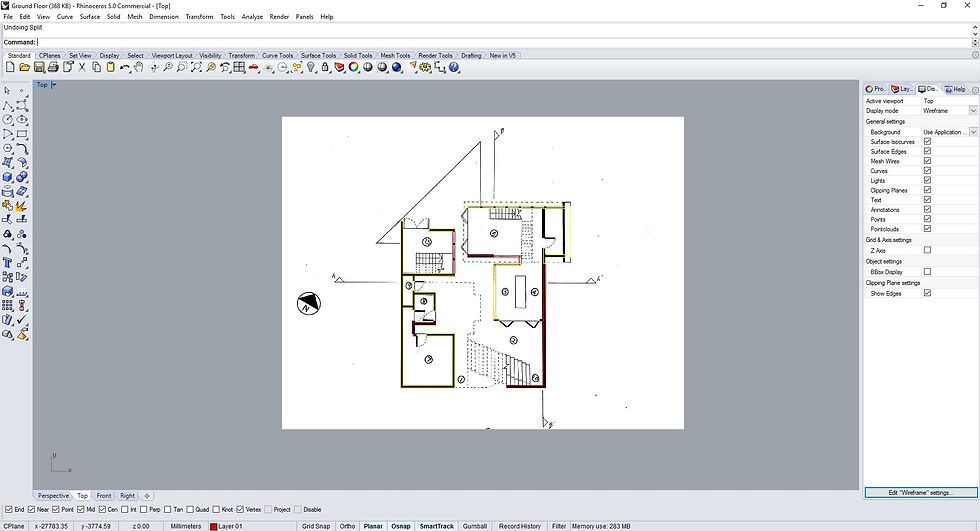
Rhino - Creating floor plan by tracing on scanned image of floor plan.
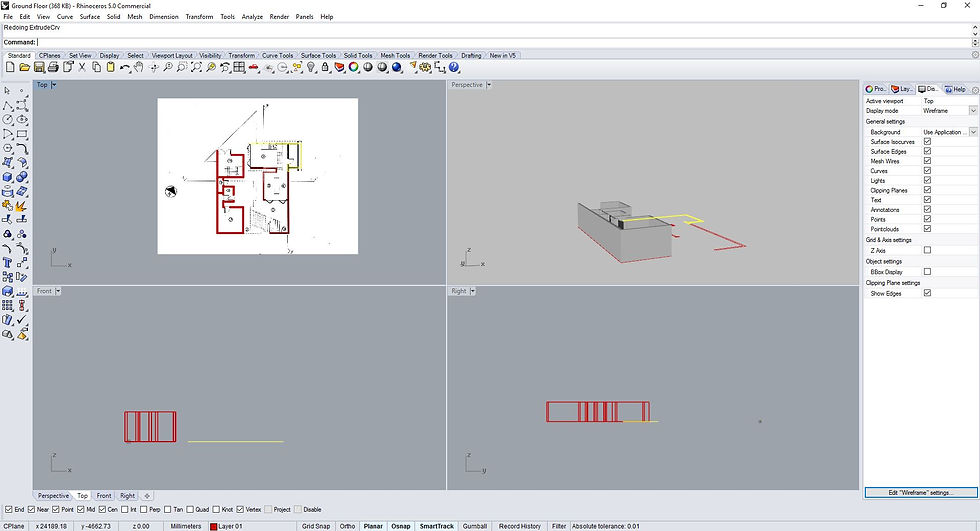
Rhino - Extruding closed curves (floor plan) to create walls.
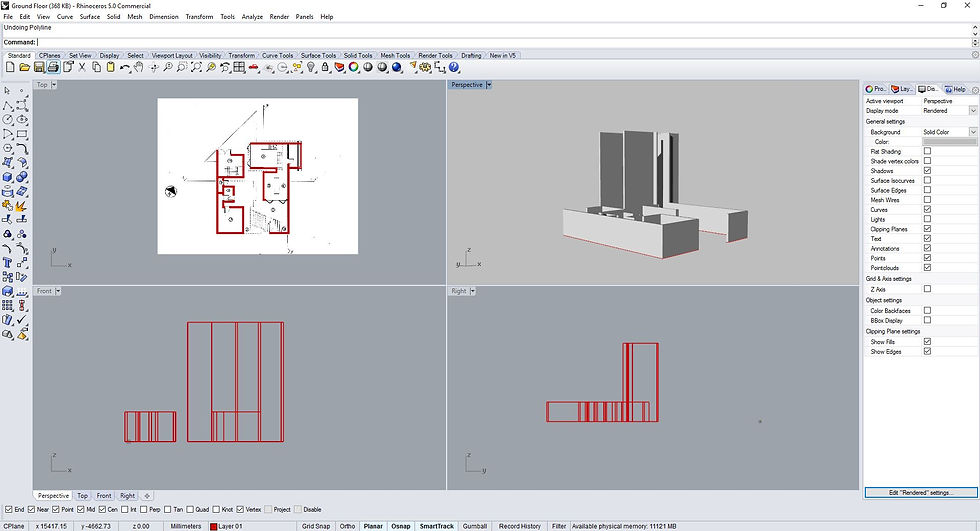
Rhino - Extrusion of Ground Floor.
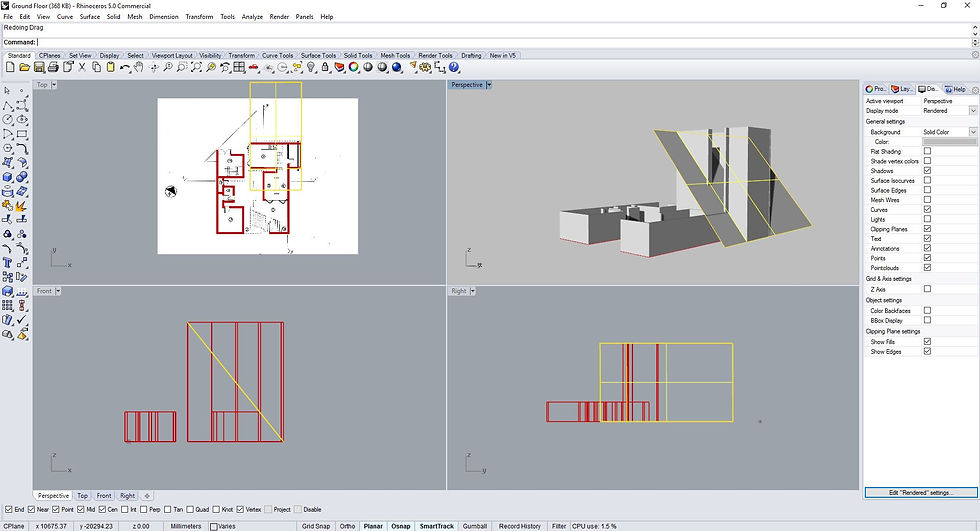
Rhino - Creating a cutting plane to split the extrusion.

Rhino - Extrusion split at an angle.
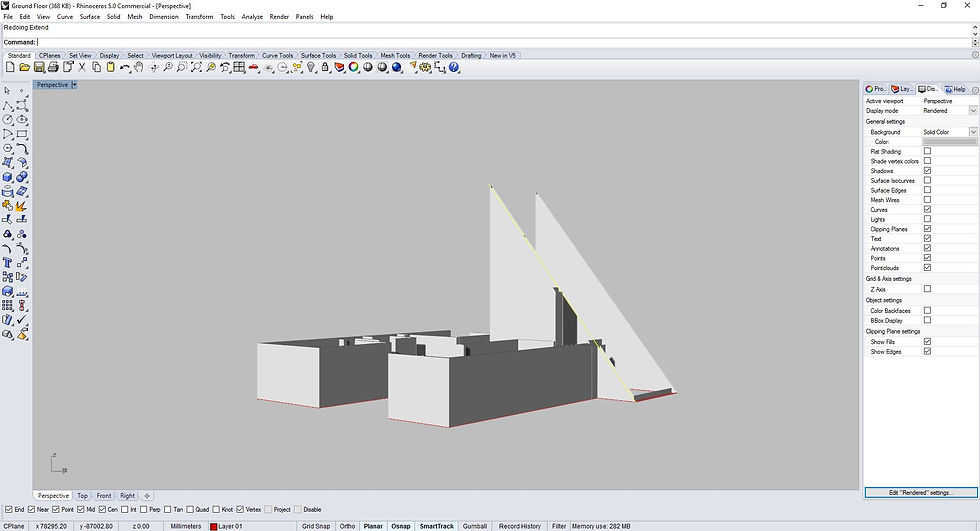
Rhino - Deleted the top half of the extrusion.
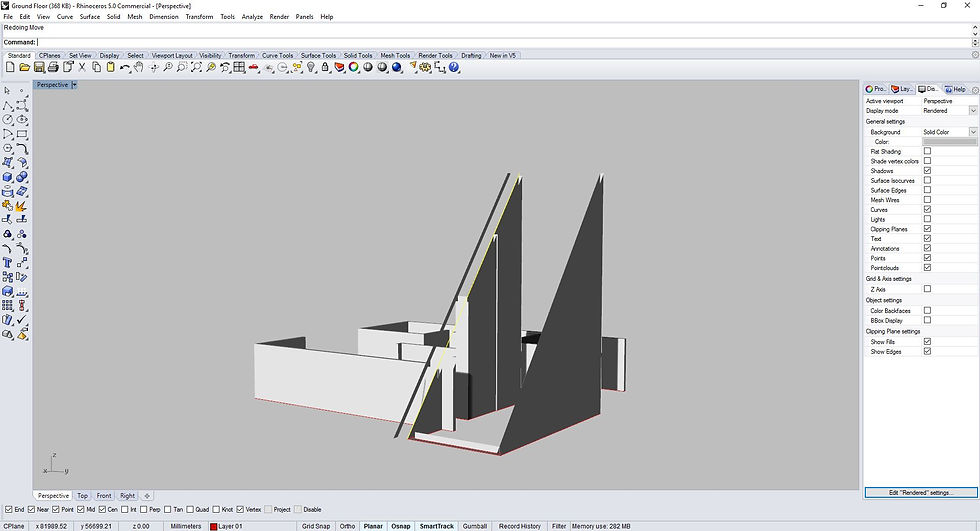
Rhino - Deleted the top half of the extrusion.
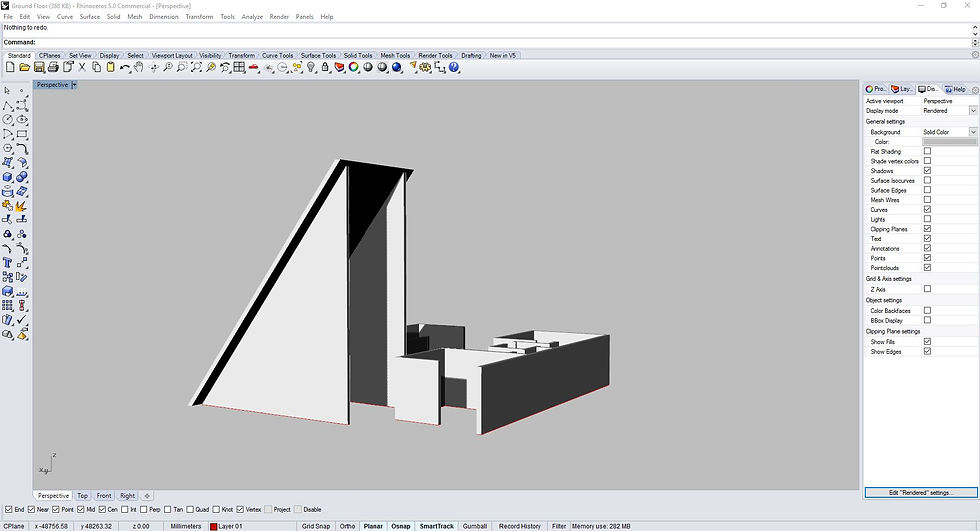
Rhino - Roof placed on top of the extrusion.
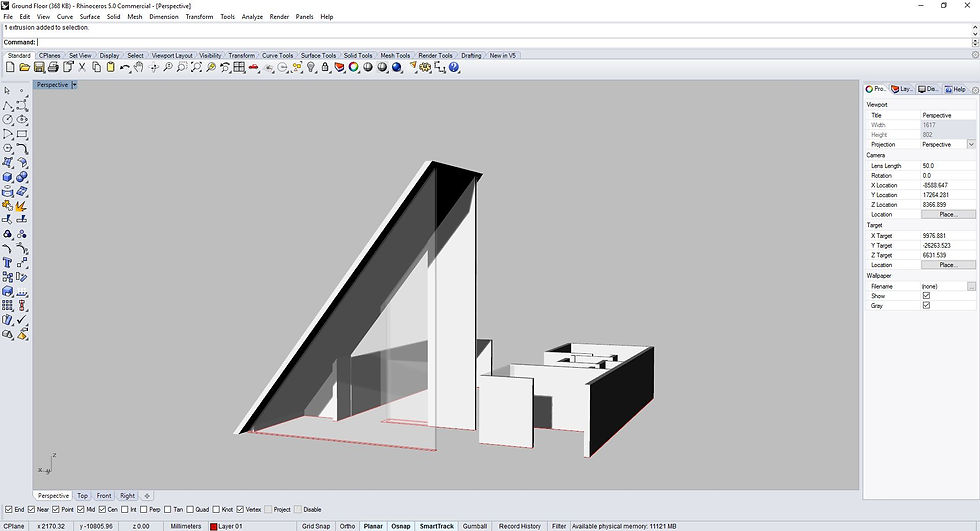
Rhino - Testing of materials.
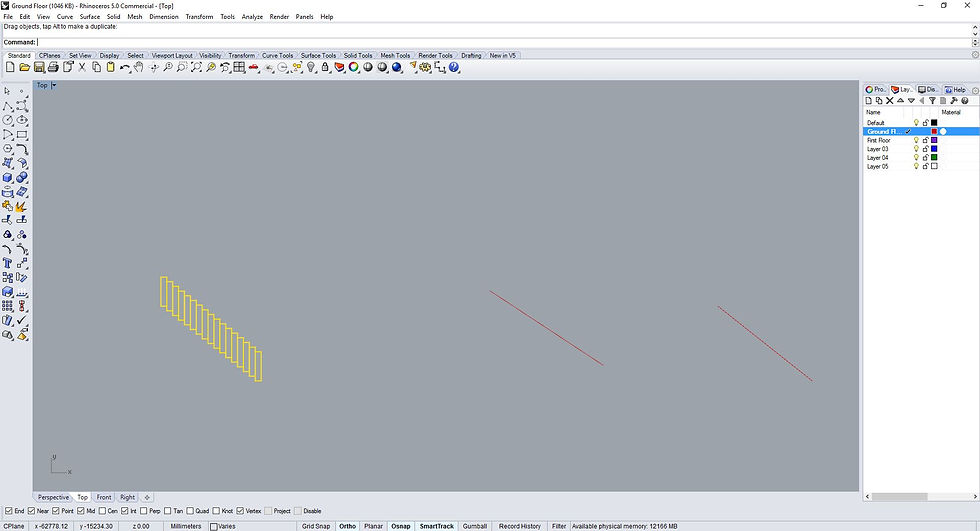
Rhino - Staircase creation via array along curve command.
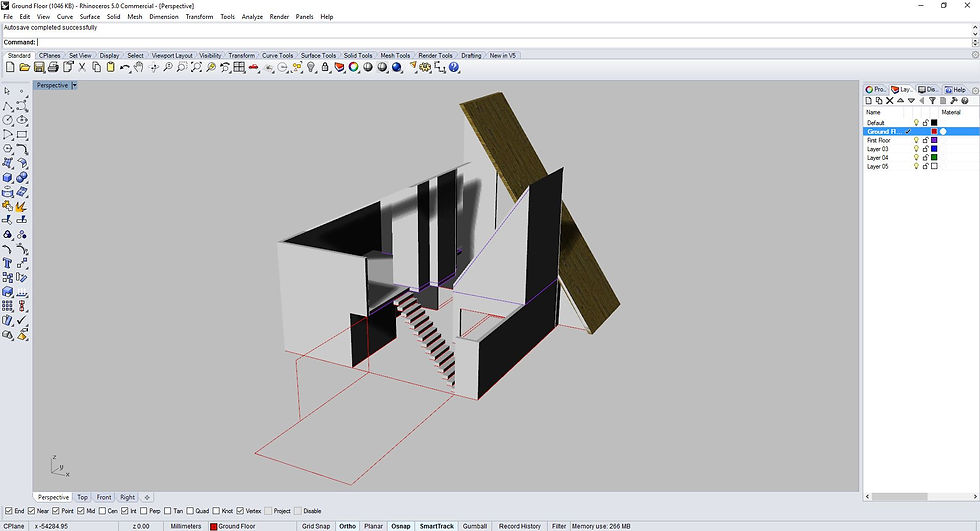
Rhino - Staircase placement.
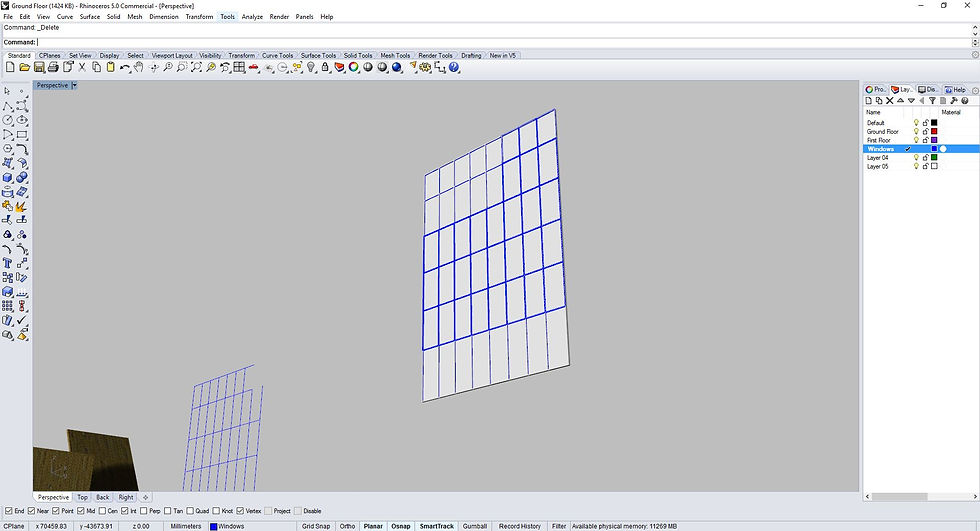
Rhino - Creating the window frame panel.
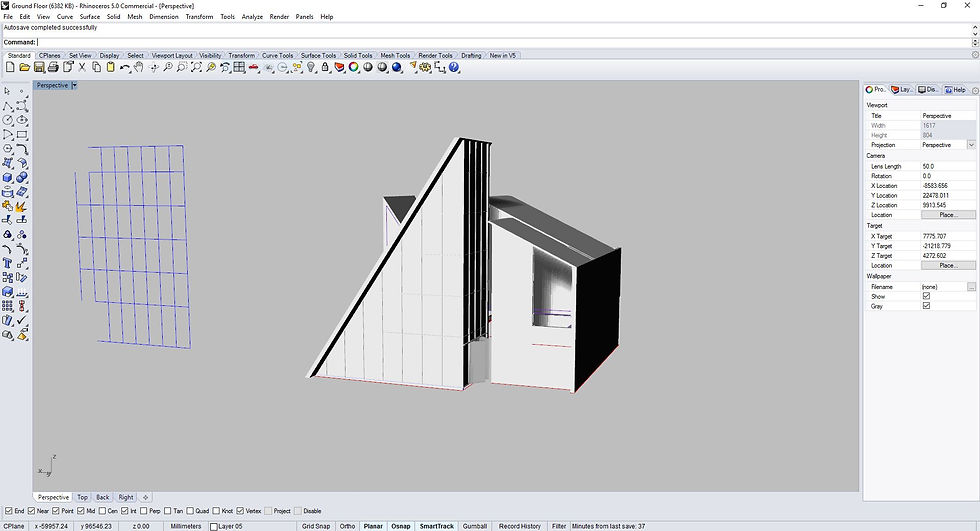
Rhino - Placement of window frame panels. Same technique used as the extrusion earlier to cut the plane at an angle.
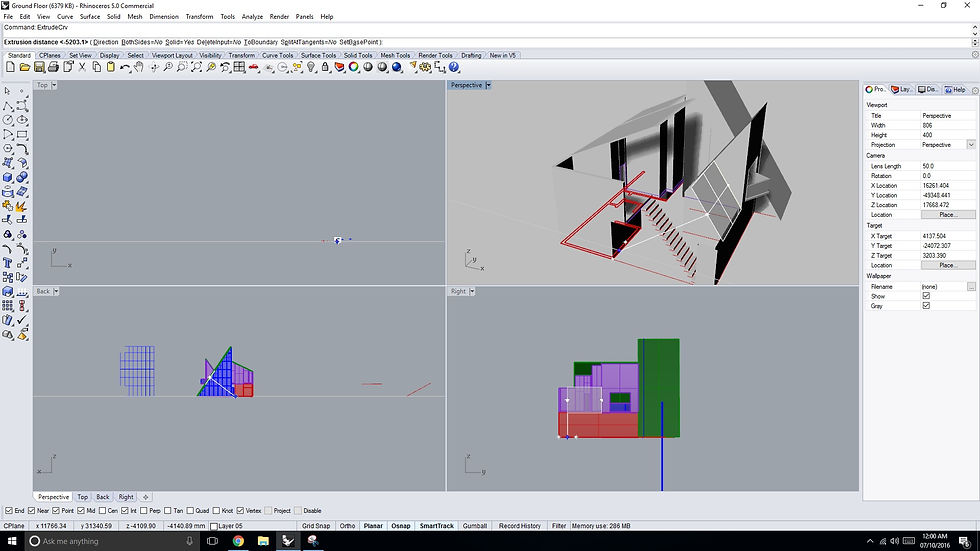
Rhino - Roof modeling.
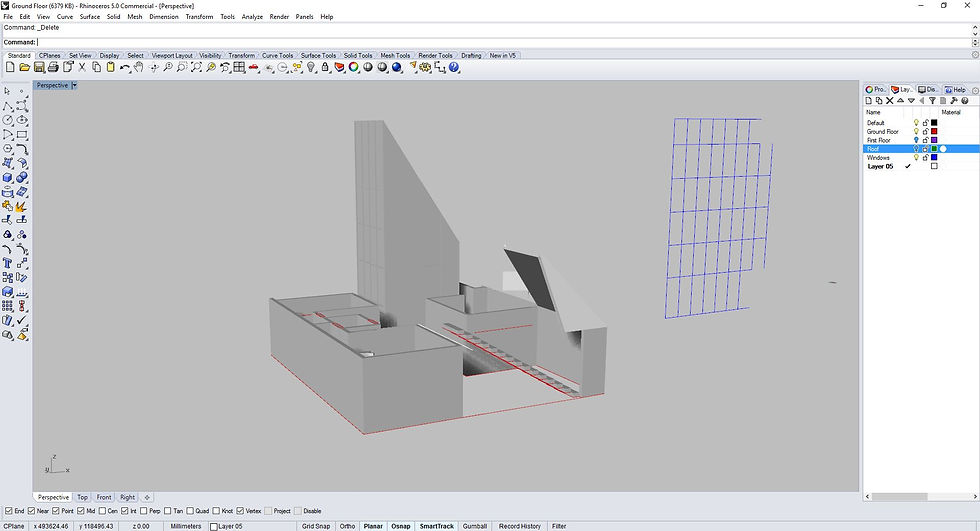
Rhino - Completing the staircase.
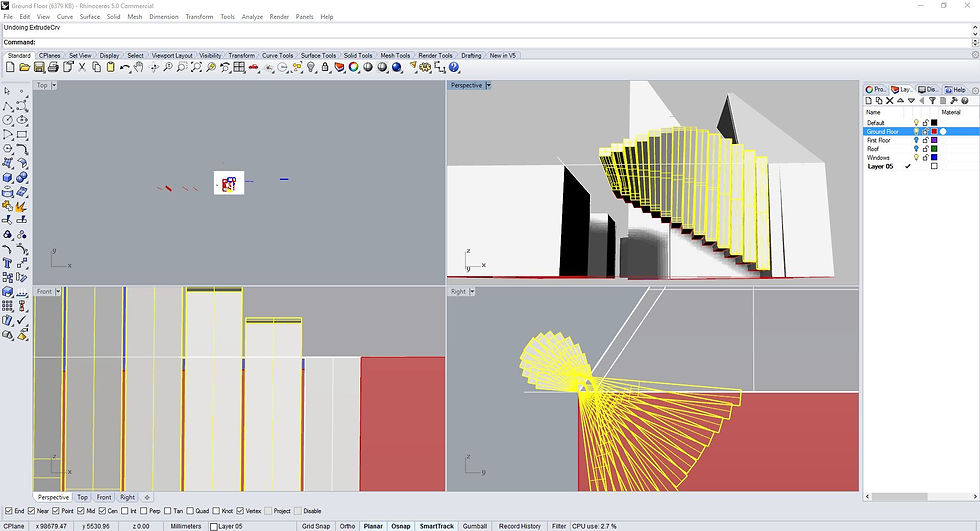
Rhino - Completing the staircase (fanned walls).
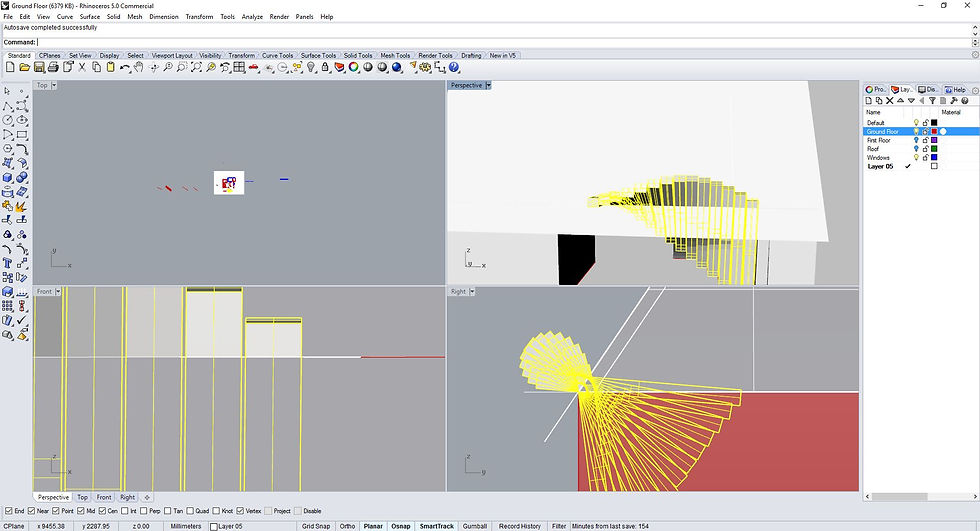
Rhino - Trimming the fanned walls.
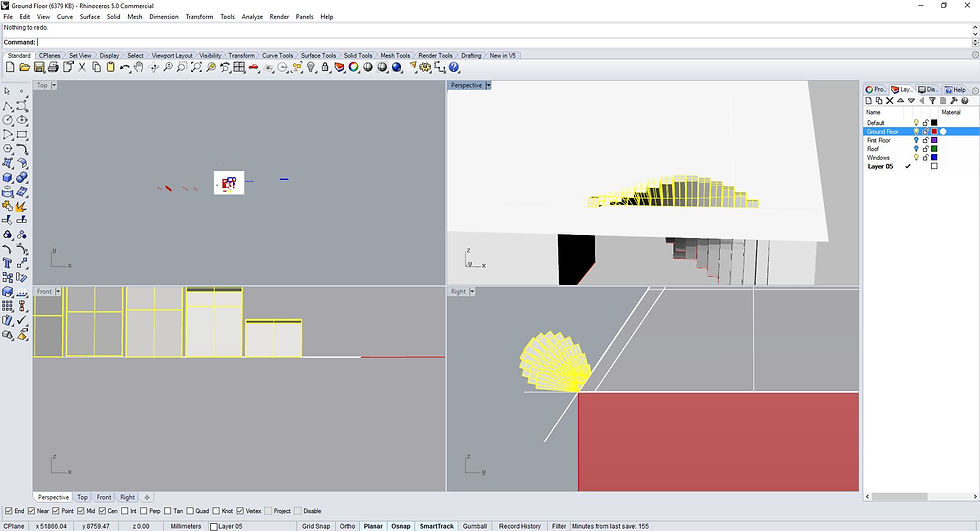
Rhino - Trimming the fanned walls.
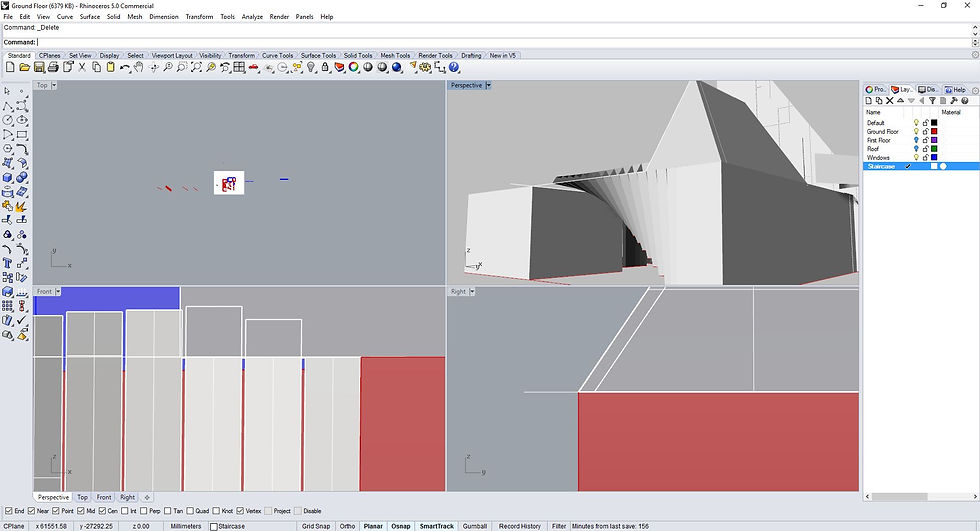
Rhino - Cut walls filled with surface.
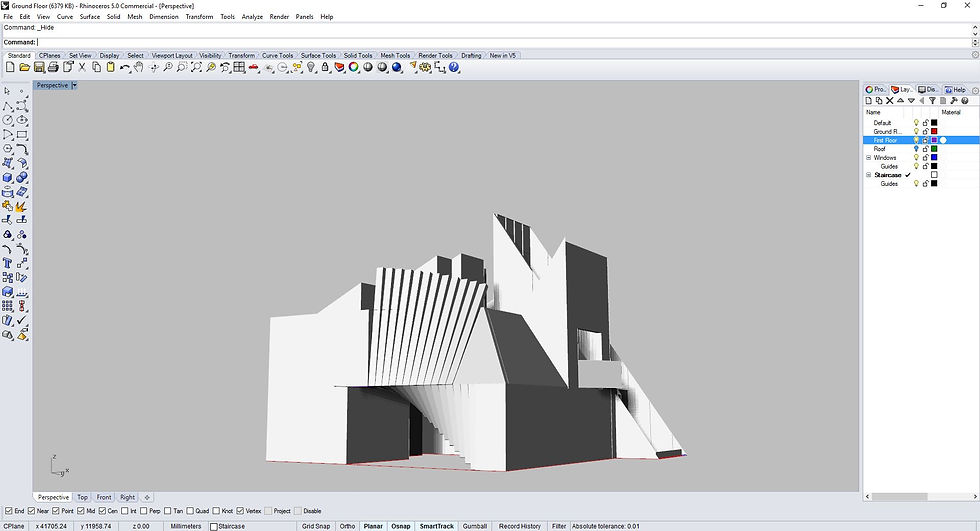
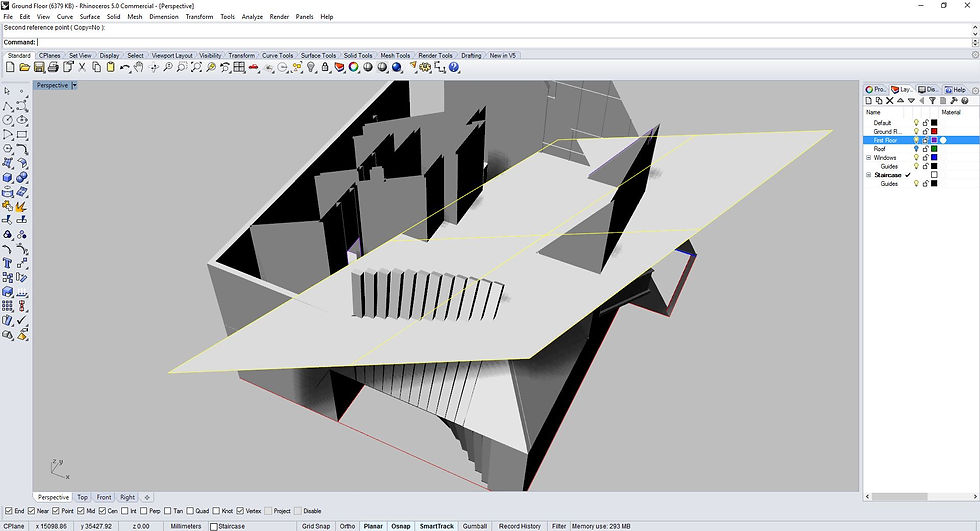
Rhino - Cutting plane is created to trim the fanned walls.
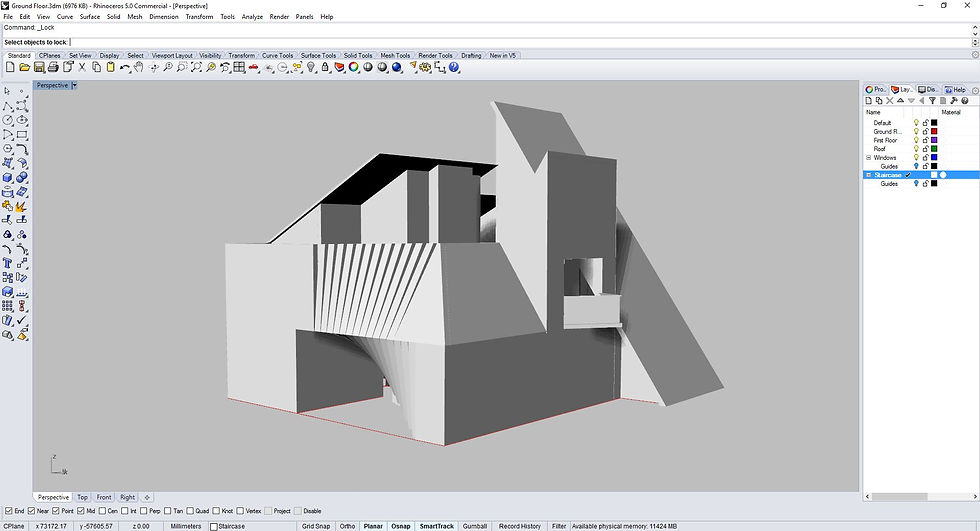
Rhino - Completed staircase.
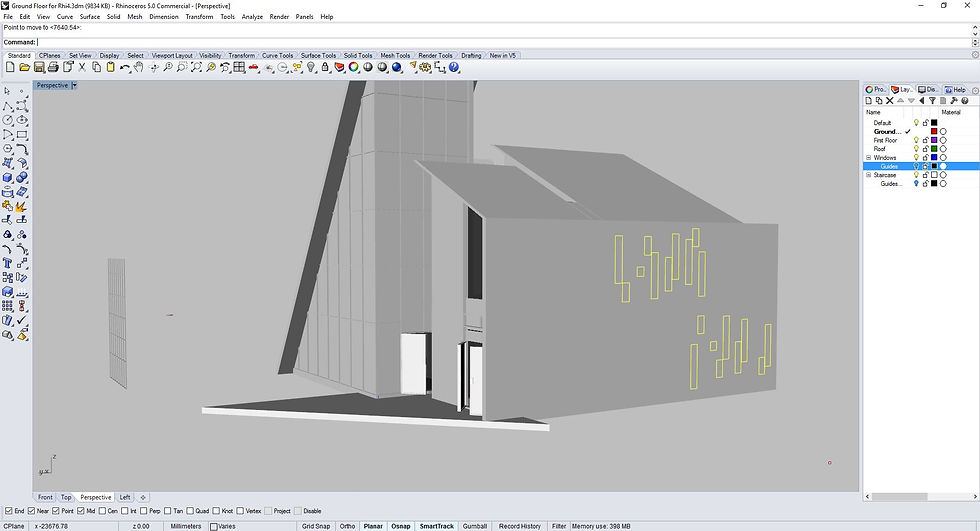
Rhino - Creating slit windows on the walls.

Rhino - Creating slit windows on the walls.
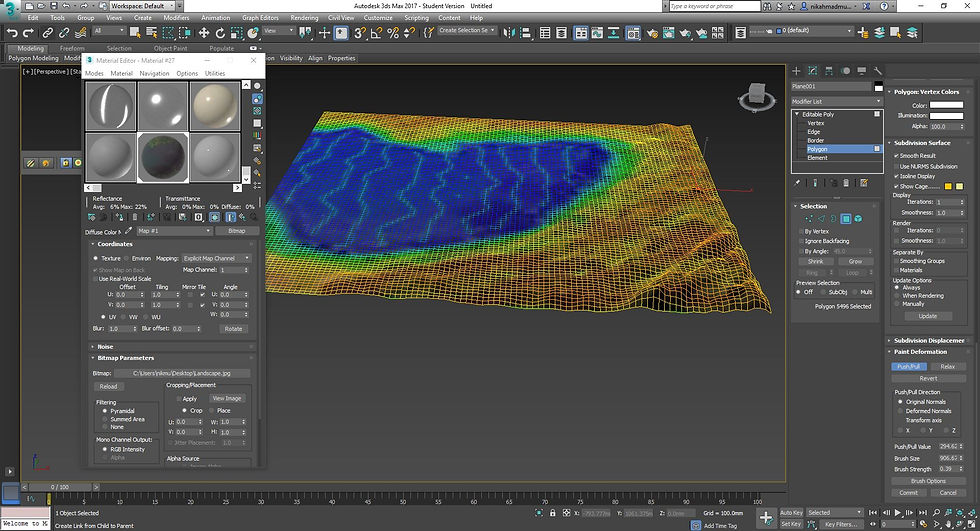
3DS Max - Creating the landscape via soft selection.
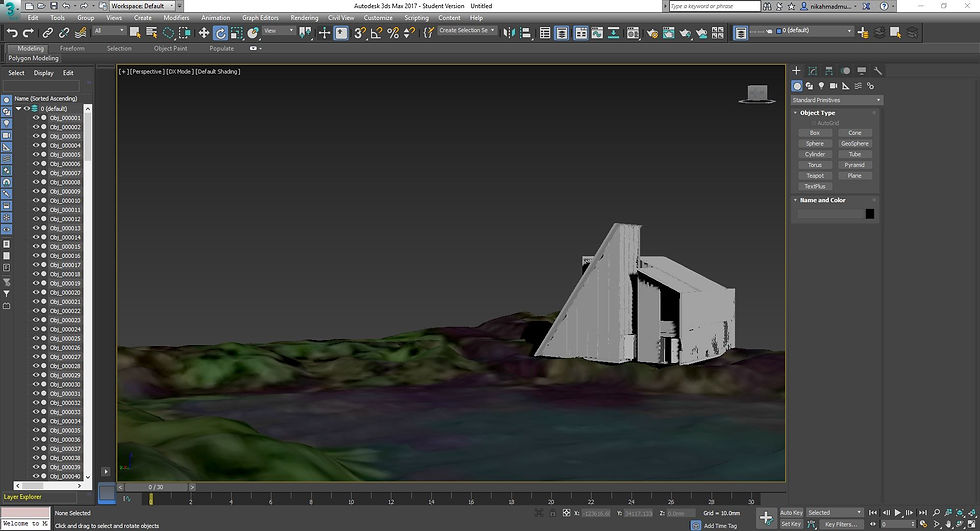
3DS Max - Placement of model onto the landscape.

3DS Max - Find tuning the landscape ground.
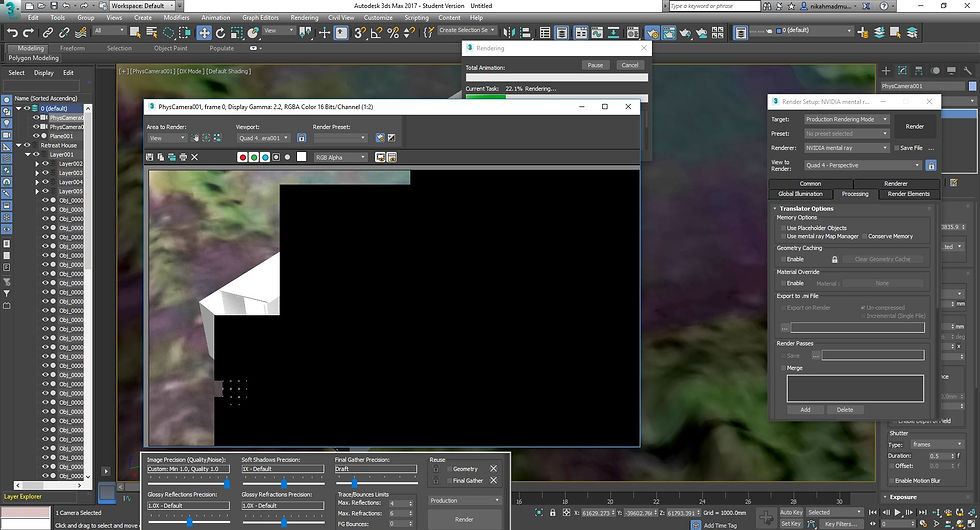
3DS Max - Rendering process.
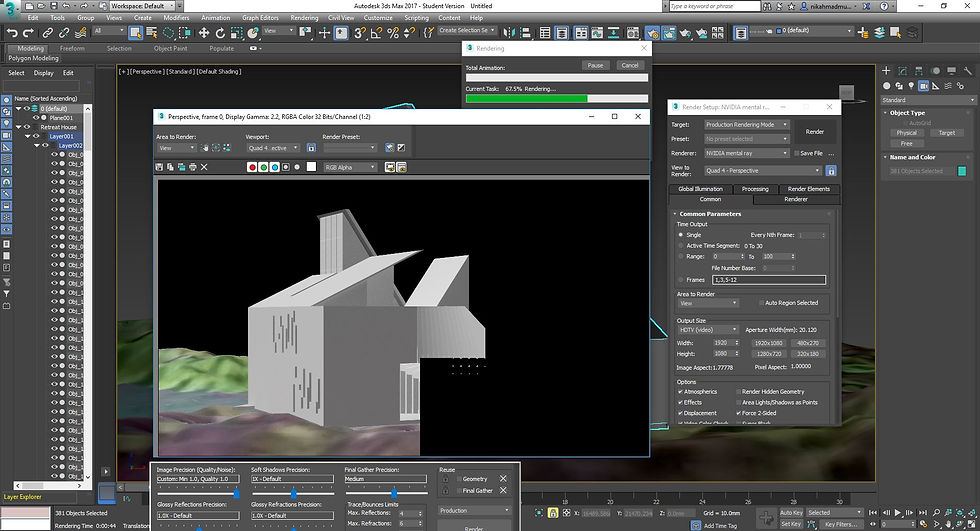
3DS Max - Rendering process.
Renderings of 3D Model.
 |  |  |
|---|---|---|
 |  |  |
 |
Project 2
The second project involves the production of photorealistic still rendering of the selected architecture design with materials, appropriate camera views and post-production enhancement on the visual outcome. The visualisation work would be assessed on the types and ways materials are used, types of lights and effects used to set up the scene, setup of appropriate camera views for rendering and skills of using post-production tools to enhance the visual outcome.
Project 2a
Project 2A focuses on the exterior rendering of the model and the surrounding context, rendered with lights and environments to produce photorealistic quality images of the model and site.
Progress Photos in 3DS Max and Photoshop
Click on the images to see detailed description
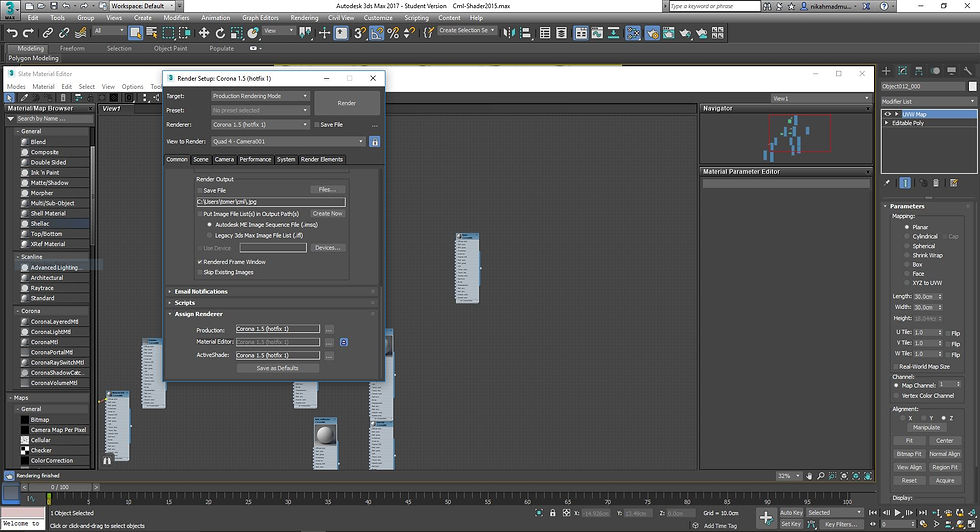
Change default 3ds Max renderer to Corona
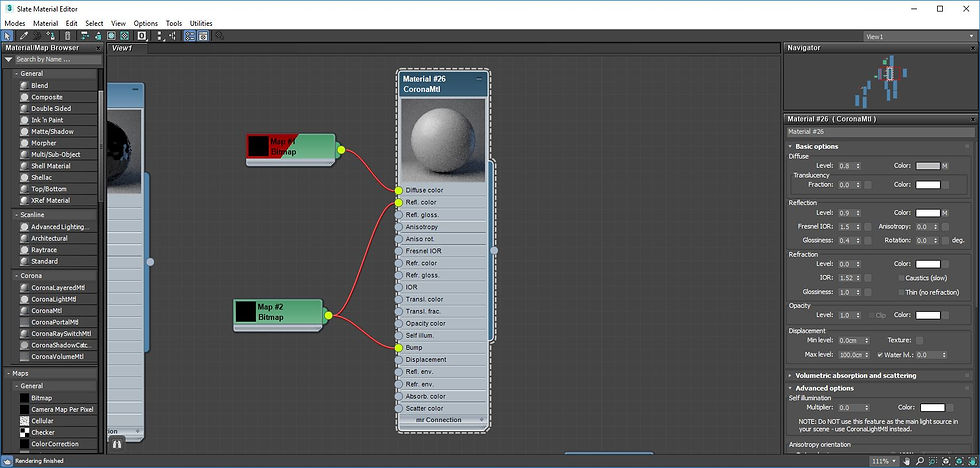
Using the Slate Material Editor, carefully plan the scene materials beforehand.
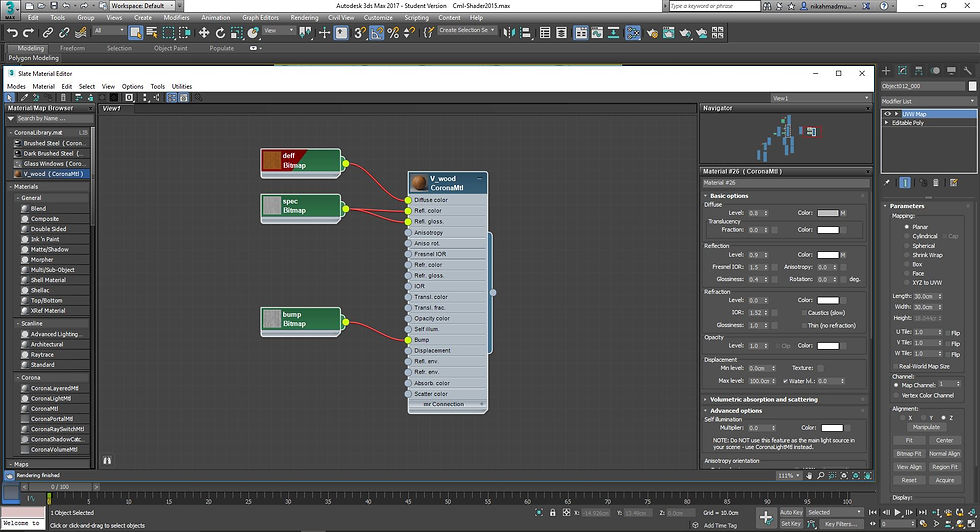
Materials are modified via diffuse, reflection and refraction settings, combined with maps for displacement or bump (if needed).
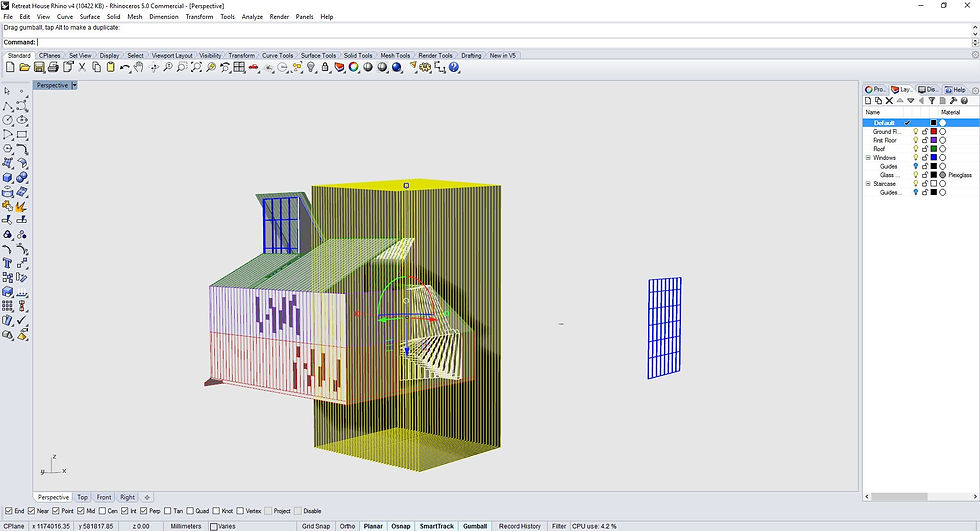
Further modification to model in Rhino, to allow for easier application of materials in 3ds Max.
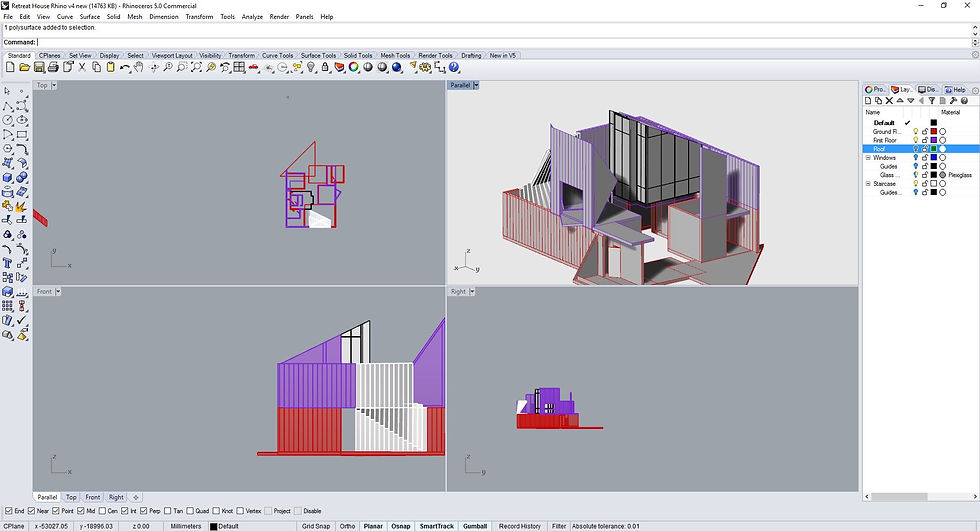
Different materials are sorted into respective layers and imported by layer into 3ds Max.
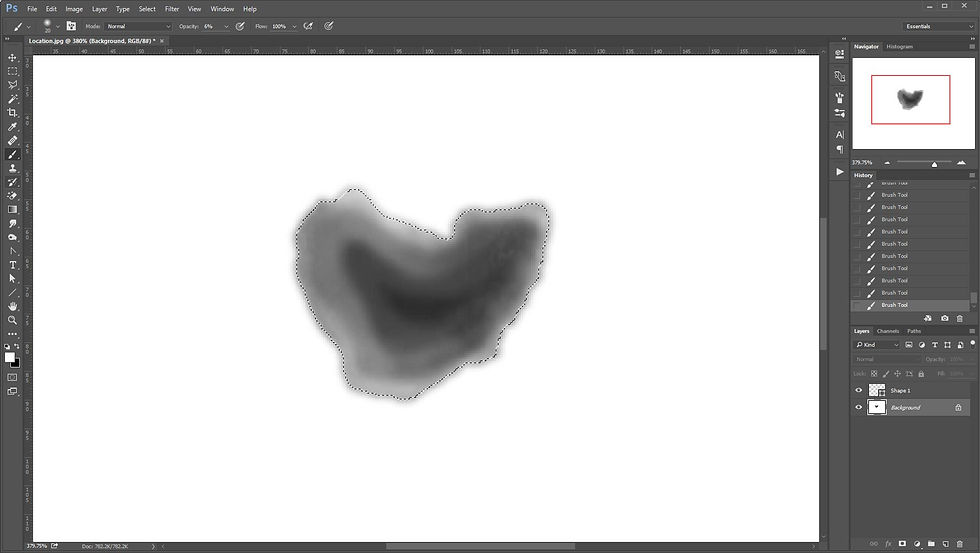
Creating a bump map for the displacement of the lake in the site terrain.
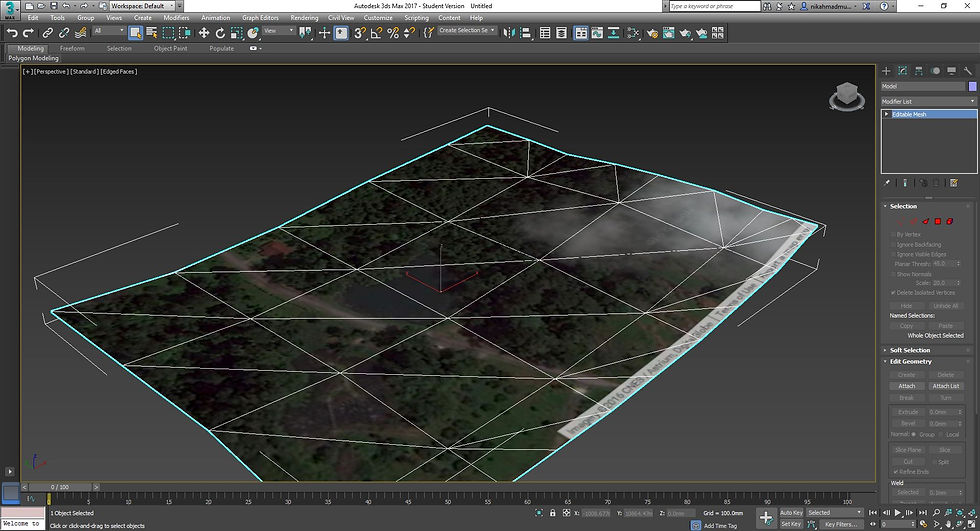
Bitmap image (from Google Maps) as a reference for the displacement.
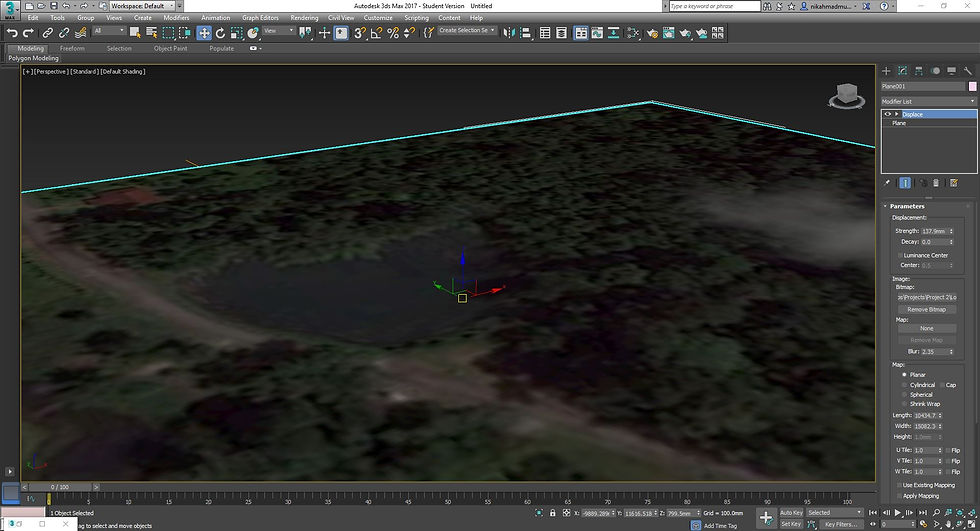
The bump map created in photoshop is applied to the displacement modifier for the plane to create the terrain for the lake.
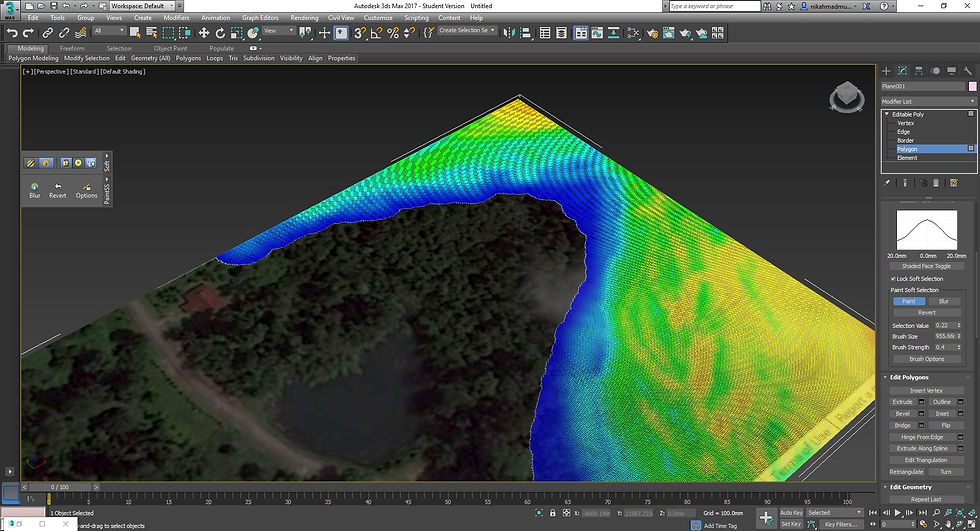
Surrounding areas of the plane modified via soft selecting the areas, and adjusting the height via push/pull modification.
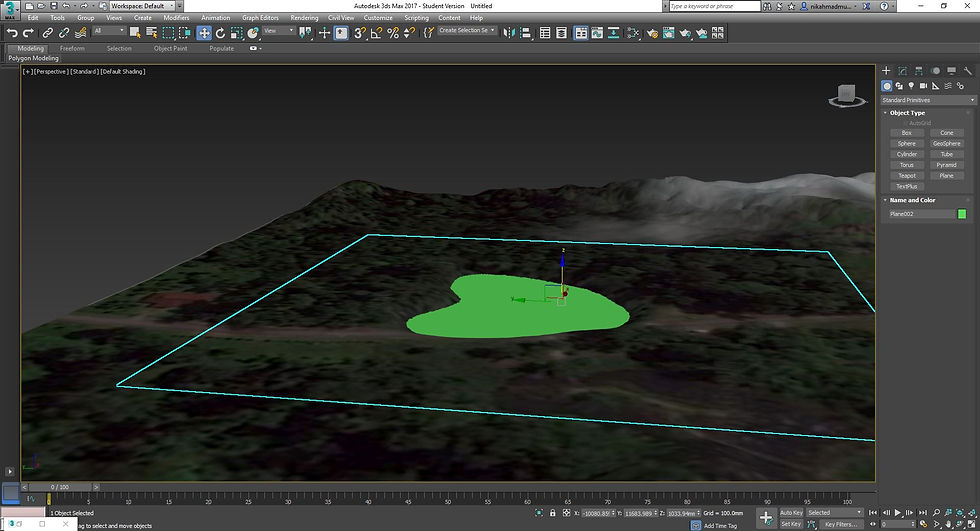
A new plane for the lake water is created and positioned where the terrain has been displaced.
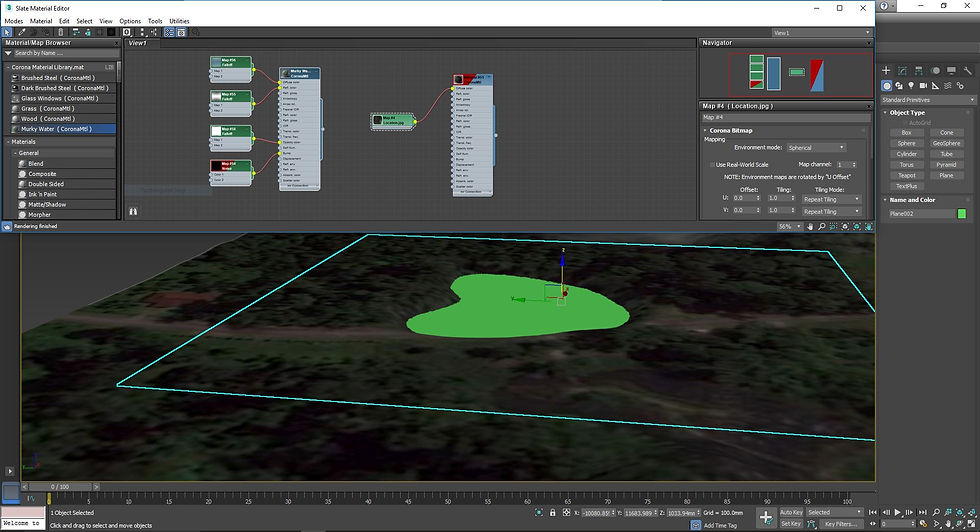
Water material created earlier is applied to the plane.
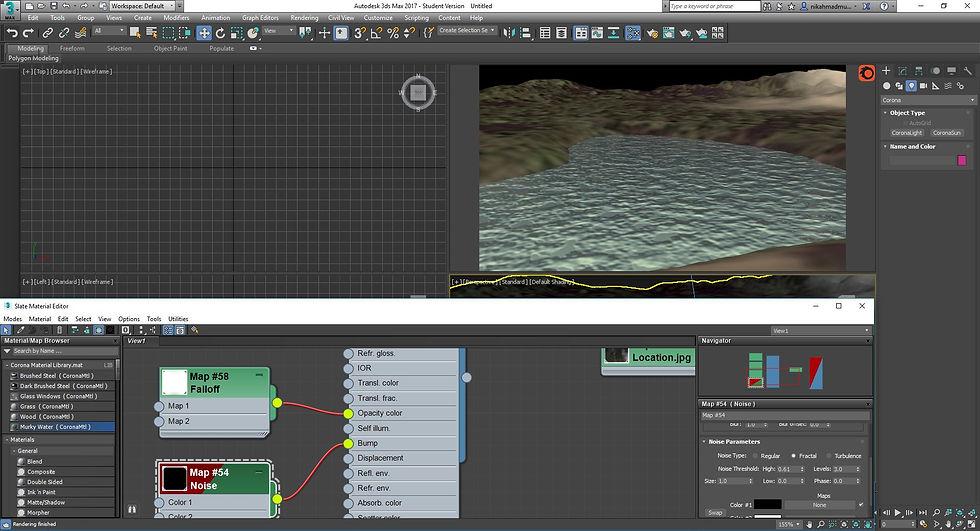
Noise is added on to the water material to give it a ripple effect.
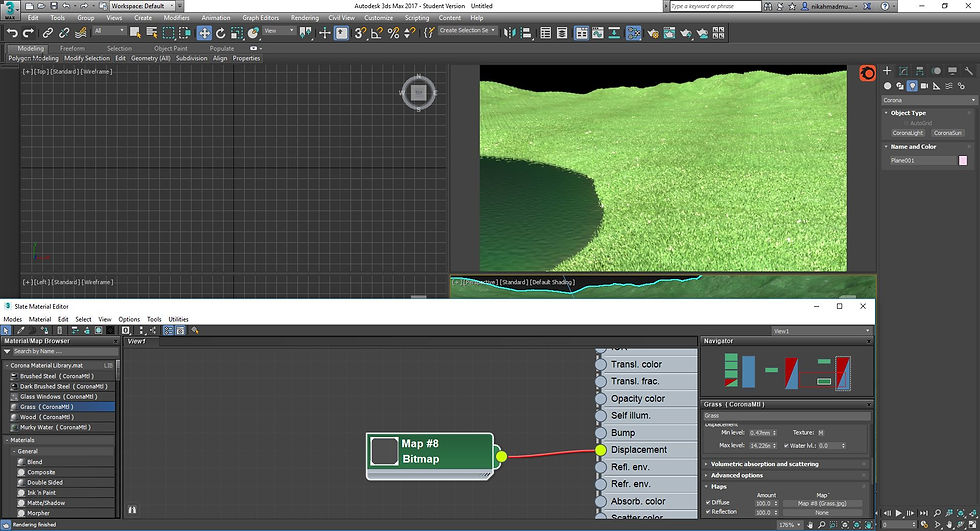
Grass material created earlier is applied to the terrain plane. Displacement is used to create a grass-like effect.
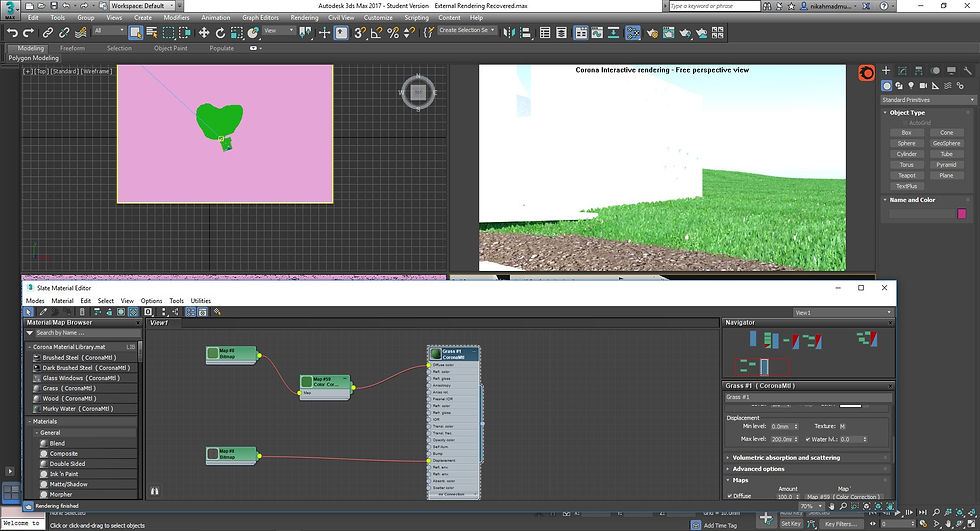
The displacement amount of the grass material determines the height of the grass.
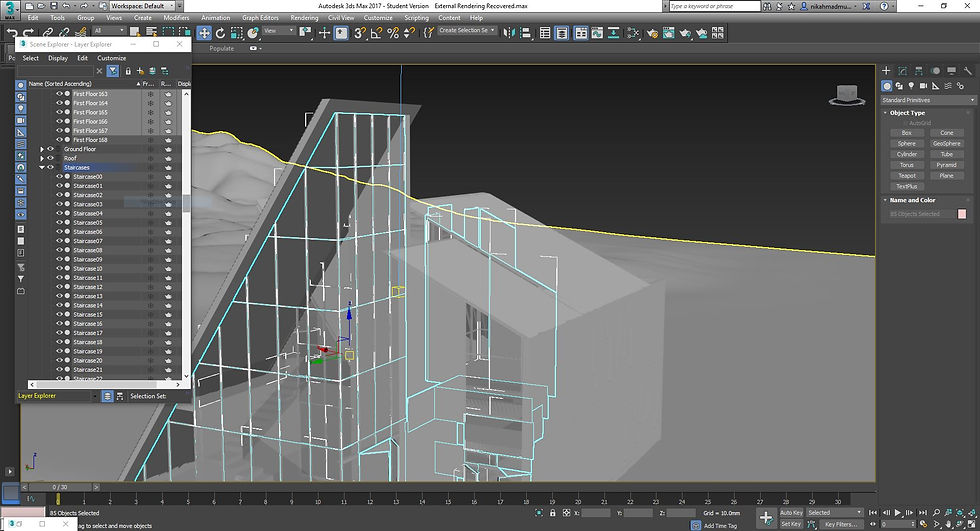
Once the model has been imported into 3ds Max, each component (according to material) is sorted into layers and their own selection sets for easy selection later.
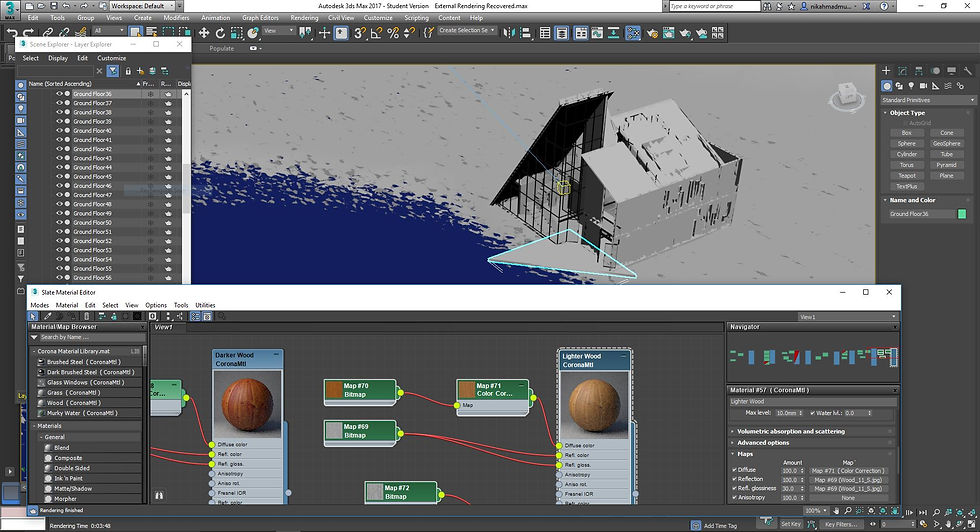
Since the wall consists of vertical wooden planks, two separate materials with different hues were created to give the wall a more natural patterned look.
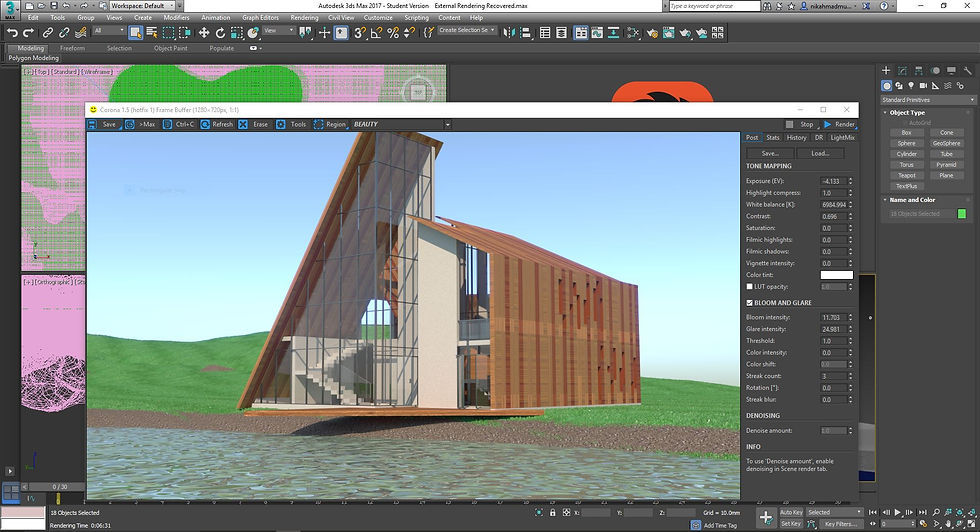
Test render to ensure the materials appear the way they should. Environment is Corona Sky which is added automatically with CoronaSun.
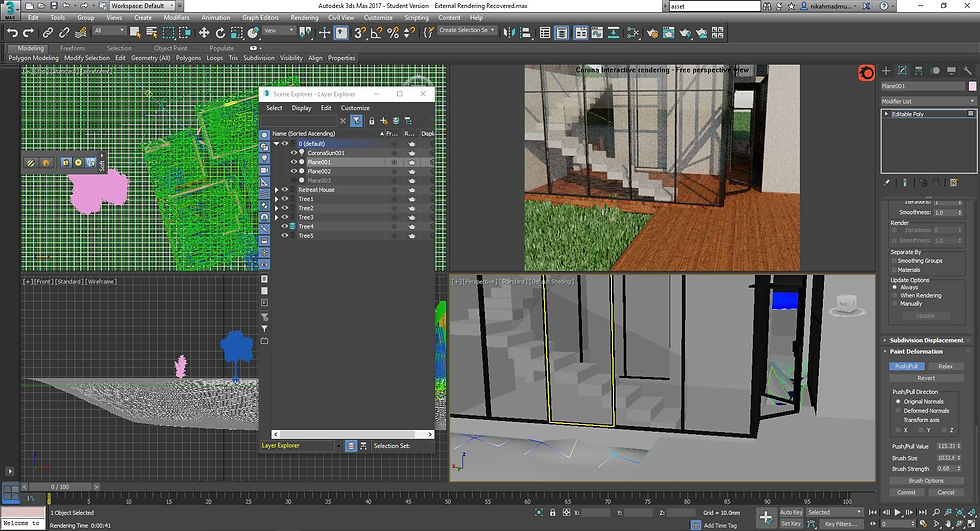
Fine tuning on the grass plane as some parts were penetrating through the model's floor.
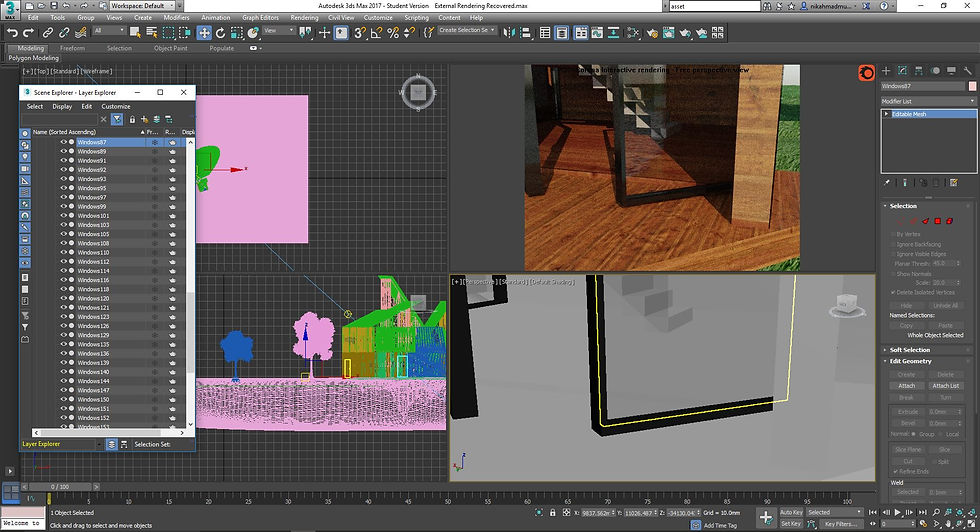
Detailed checking of each corner of the model to ensure that it sits well on the plane.
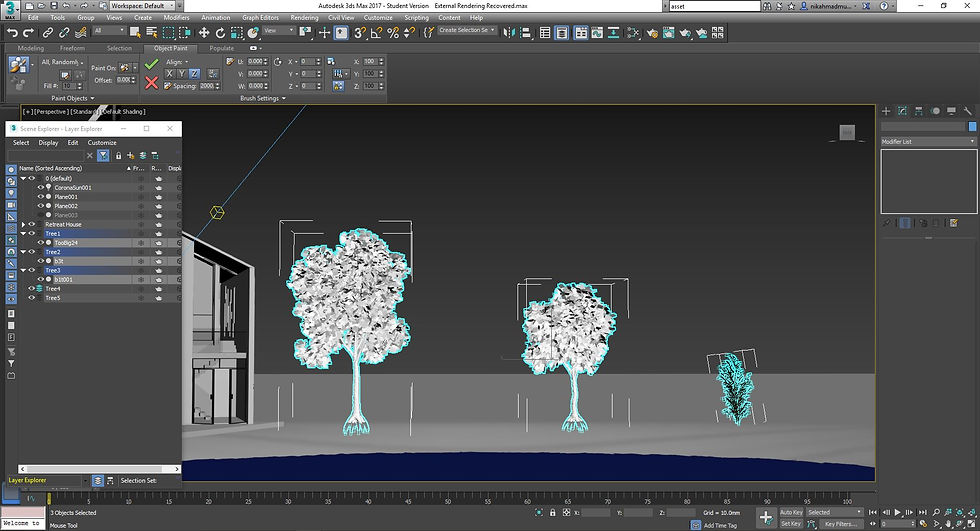
Tree models placed on the scene to be brushed onto the terrain plane.
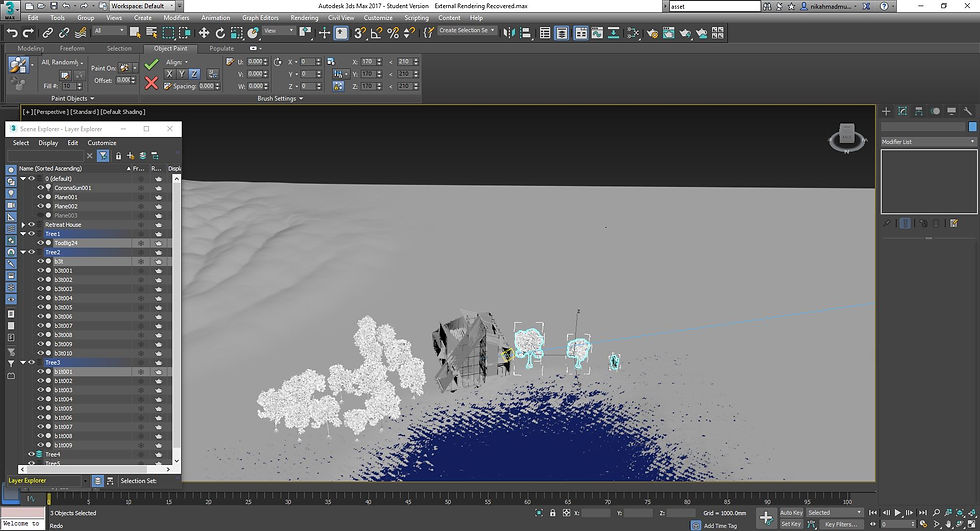
Object brush is used to efficiently scatter the tree models all over the terrain.
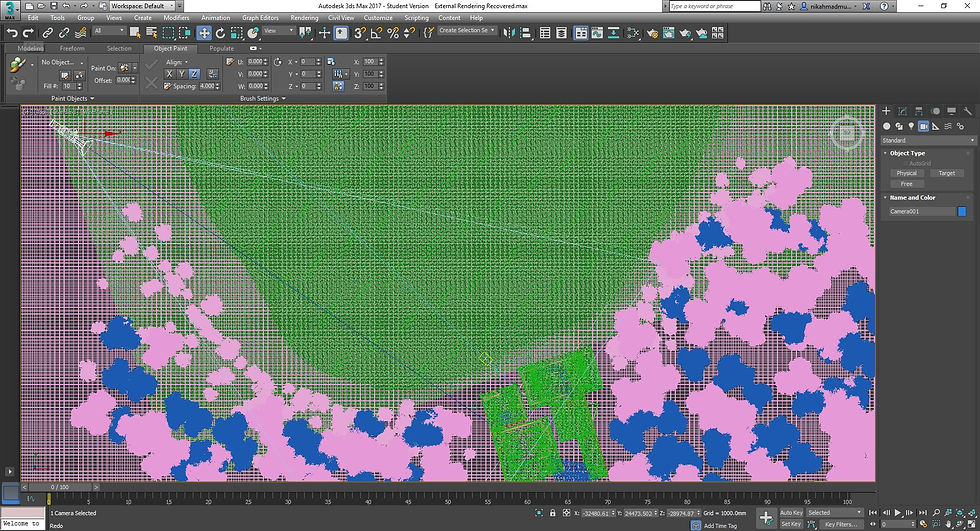
Identifying ideal locations for camera positioning.
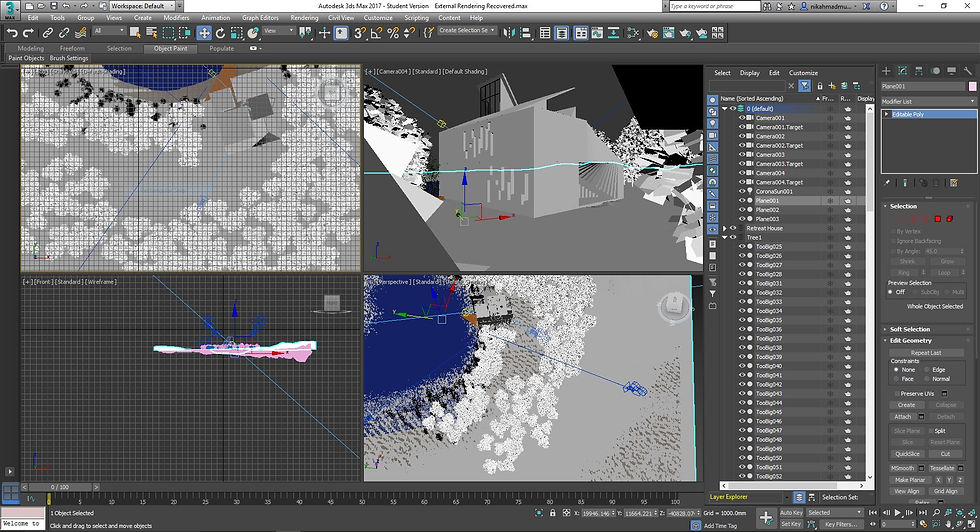
Cameras positioned at different locations to frame the model and the surrounding vegetations. The rule of thirds is observed in this process.

Once rendered, two of the best images were chosen and were then edited further in Adobe Photoshop.
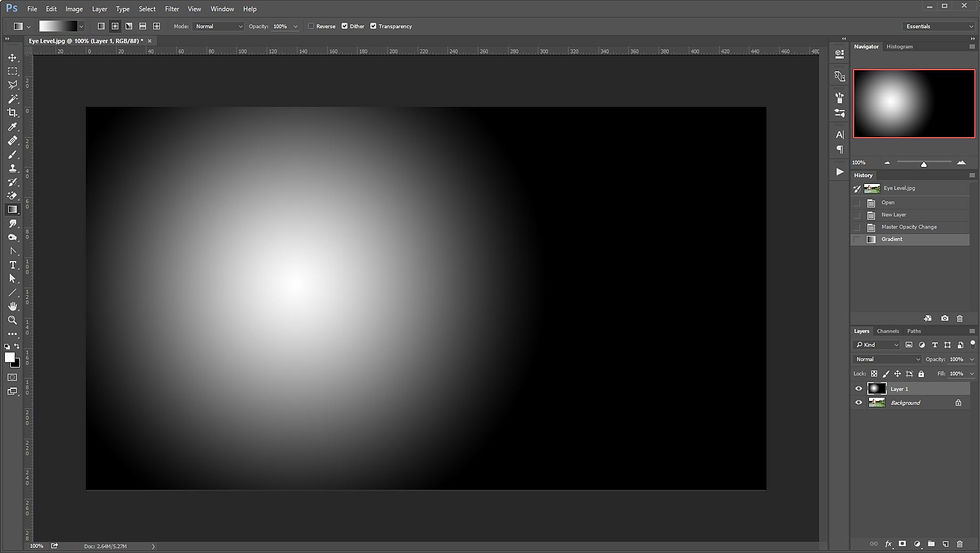
A new layer for radial gradient is created on top of the image to create a focus onto the model.
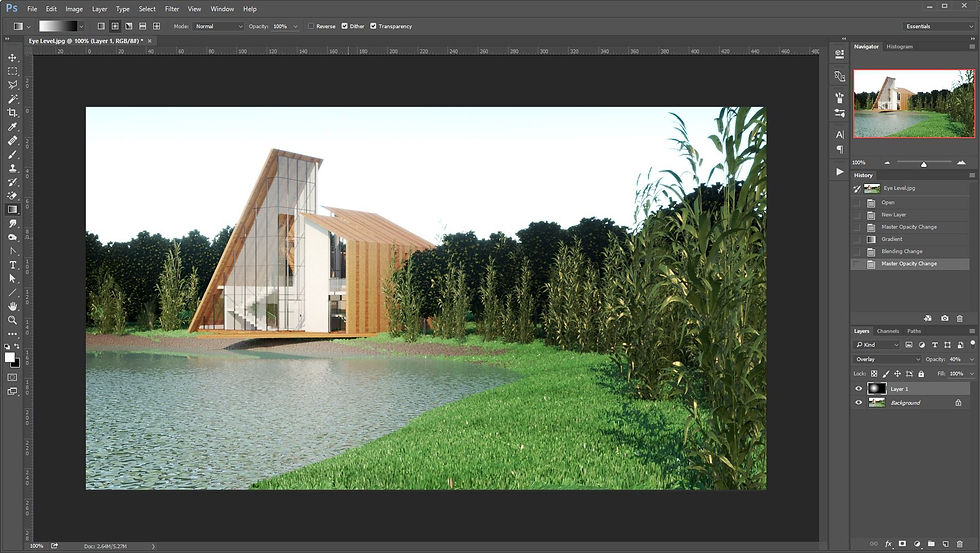
The gradient layer is then blended with the rendered image by using the overlay option.

Curves is used as a quick way to enhance the image appearance.
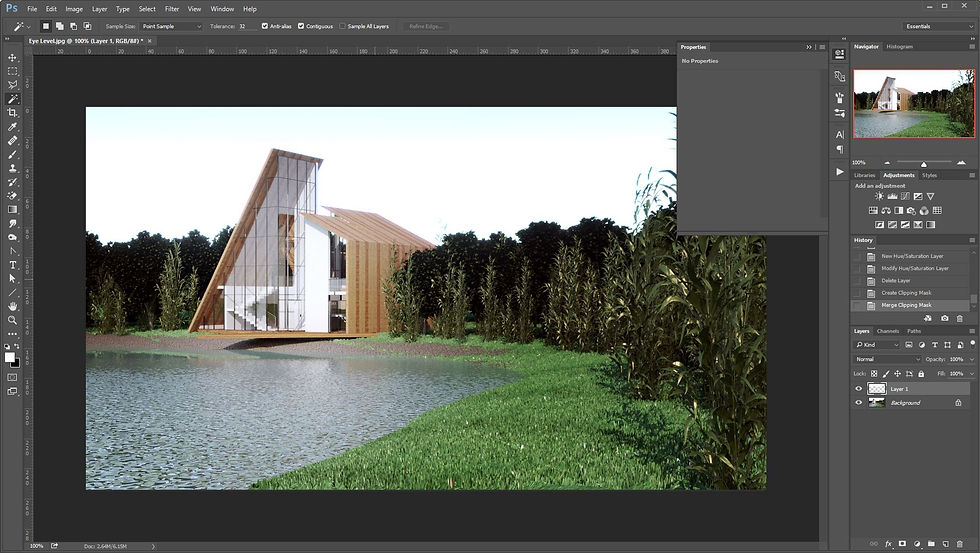
The sky layer is duplicated to be used as a glare medium.
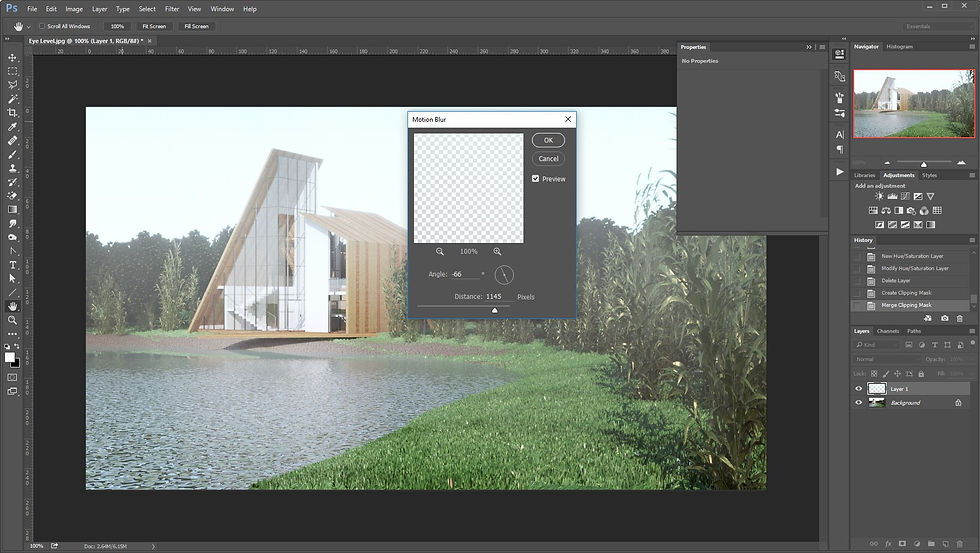
Motion blur is applied to the duplicated sky layer and rotated which gives the glare effect.
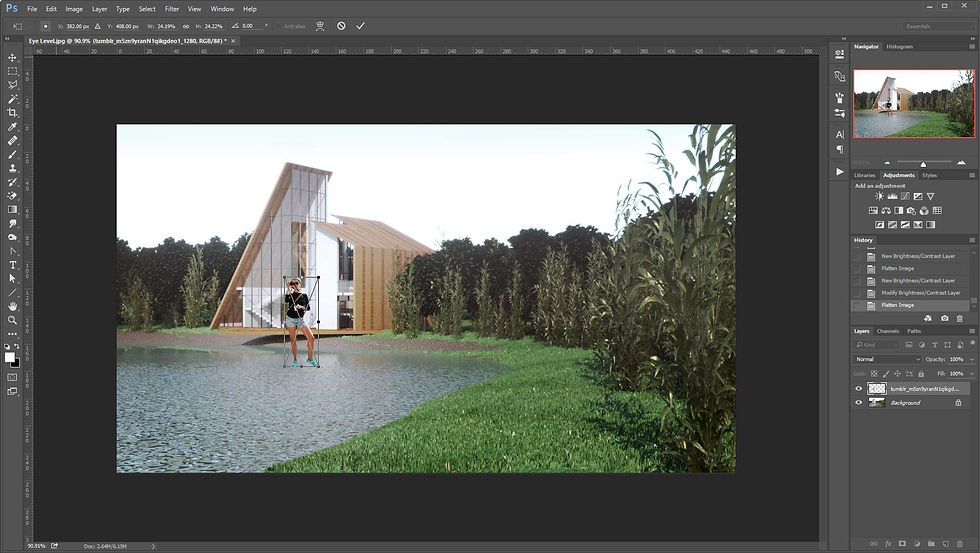
Human figures were then added on to the scene to give a sense of scale to the model and the surrounding environment. Color adjustments were made and shadows were added to blend the human figures into the image.
External Renderings
 |  |
|---|
Project 2b
Project 2B involves rendering the interior spaces of the model with details, rendered with lights and environments to produce a photorealistic representation of the spaces.
Progress Photos in 3DS Max and Photoshop
Click on the images to see detailed description
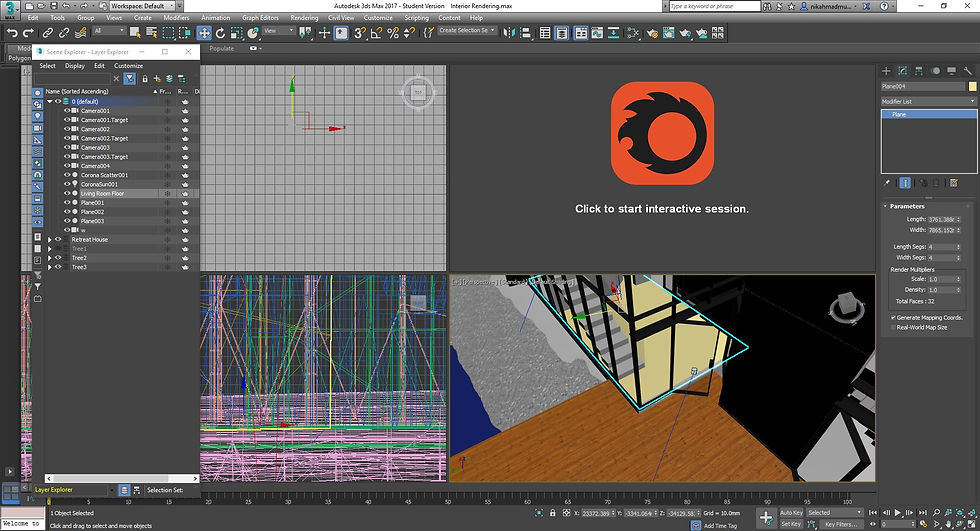
A new plane is added onto the living room floor to enable new flooring material to be applied.
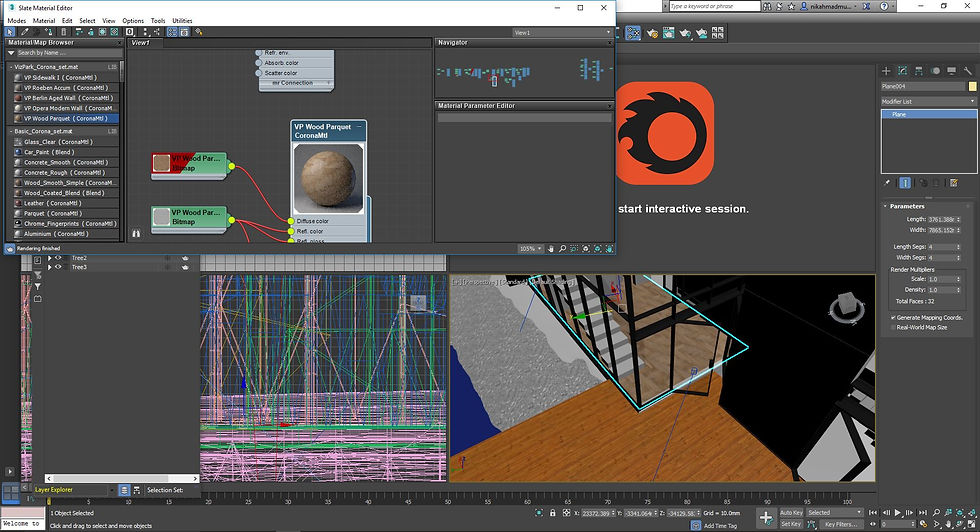
Downloaded material is applied to the living room floor plane.
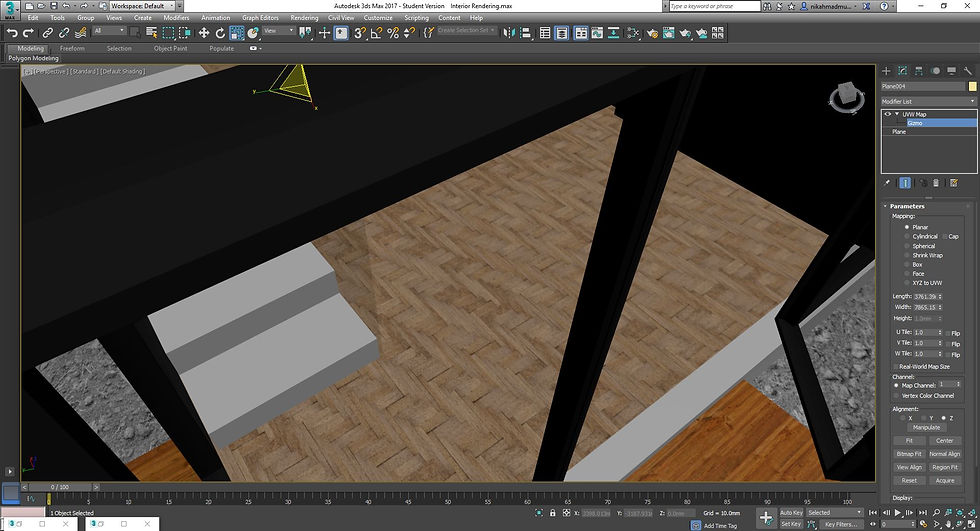
UVW mapping modifier is used to orientate and scale the material applied on the floor plane by using the gizmo.
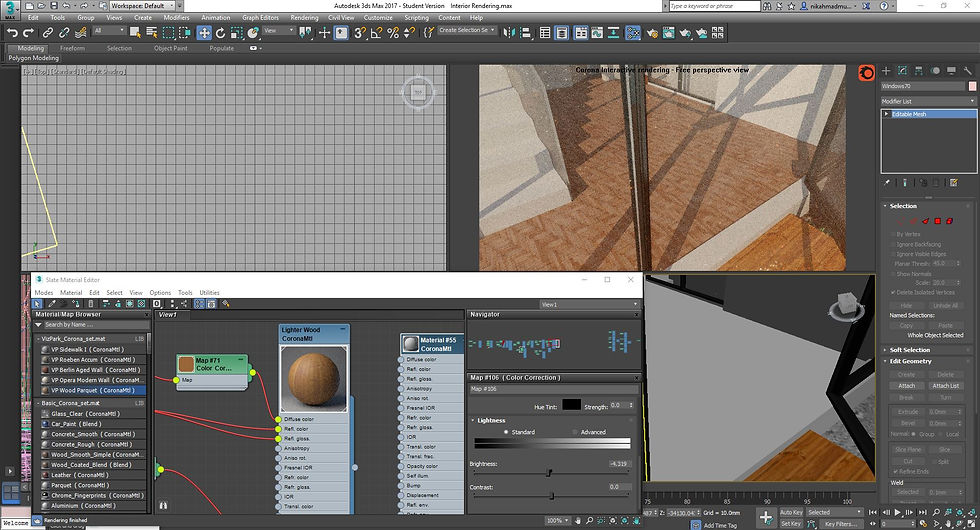
Checking in the Corona interactive renderer to ensure the outcome of the texturing is as desired.
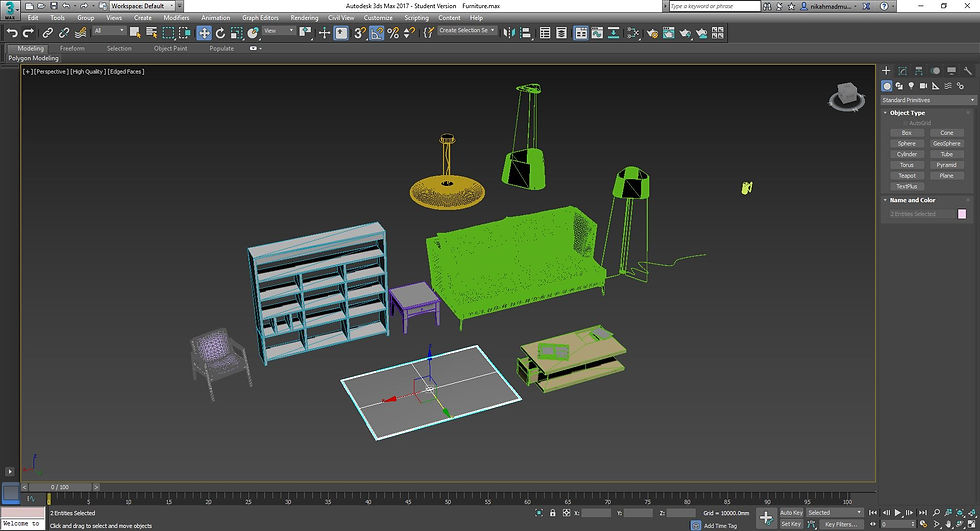
Models downloaded online are compiled in a new scene and scaled to ensure that each are consistent with each other.
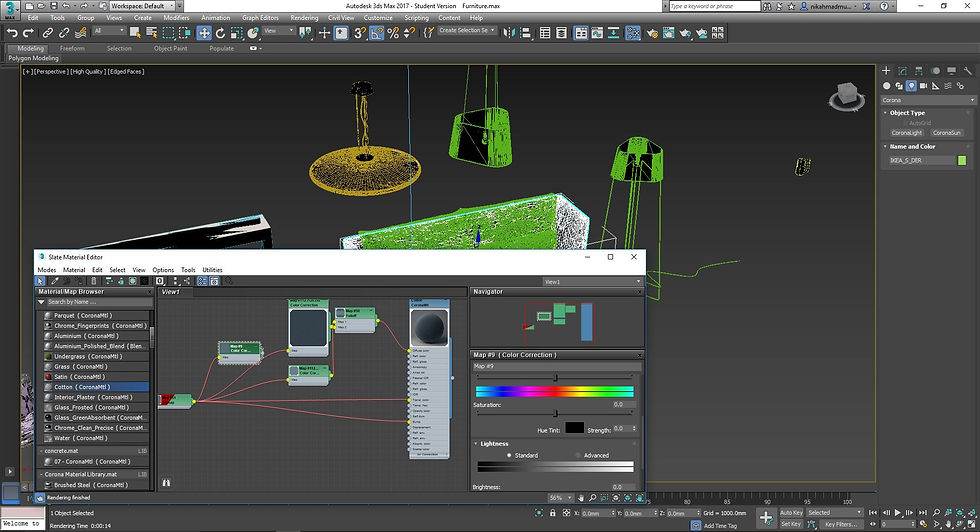
Custom materials are applied to the downloaded models to ensure realistic outcome.
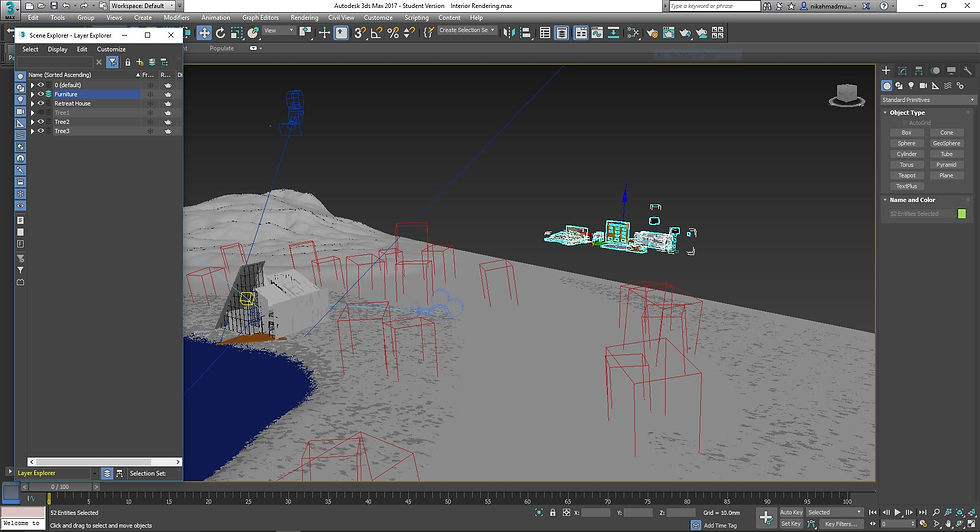
The furniture scene is then imported into the main scene and scaled proportionately.
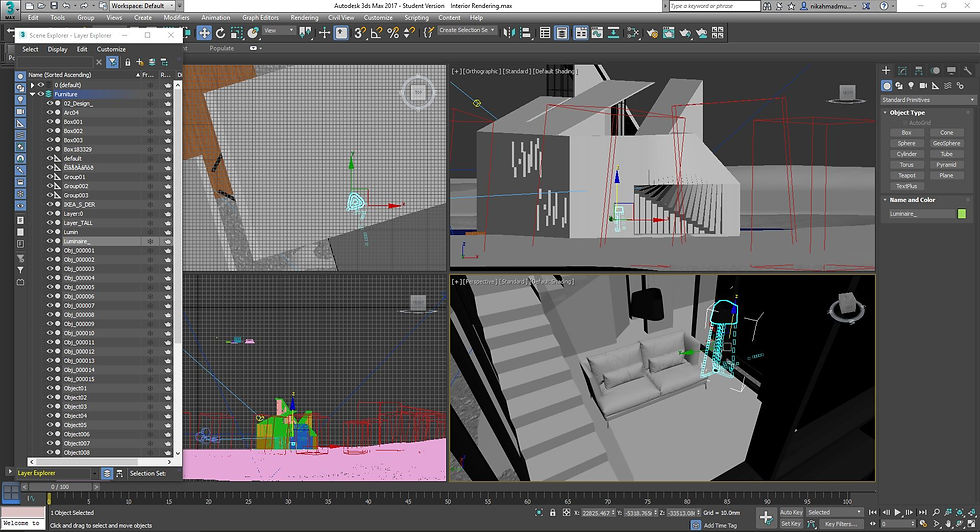
The models are then placed inside the interior spaces of the models, and (when necessary) re-scaled to an appropriate size.
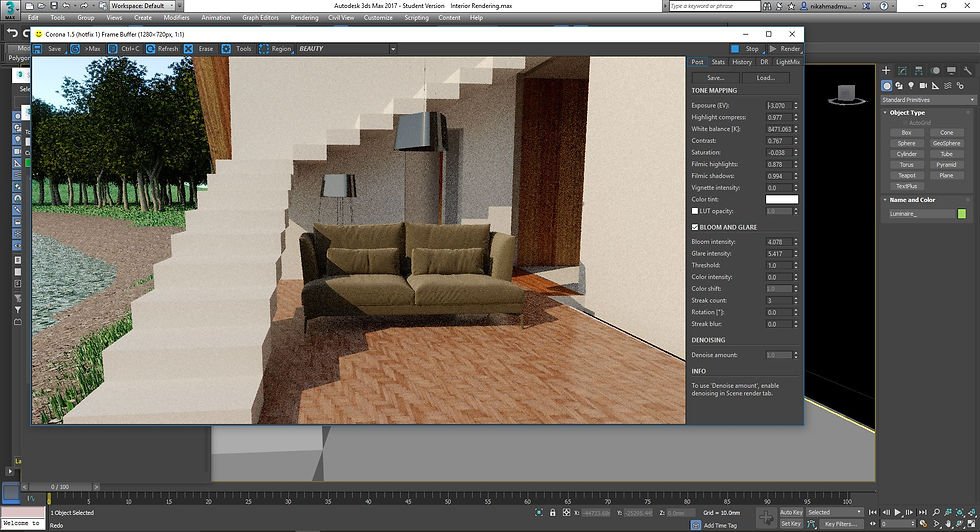
A quick test render is done to check positioning of furnitures against lighting and other elements in the space.
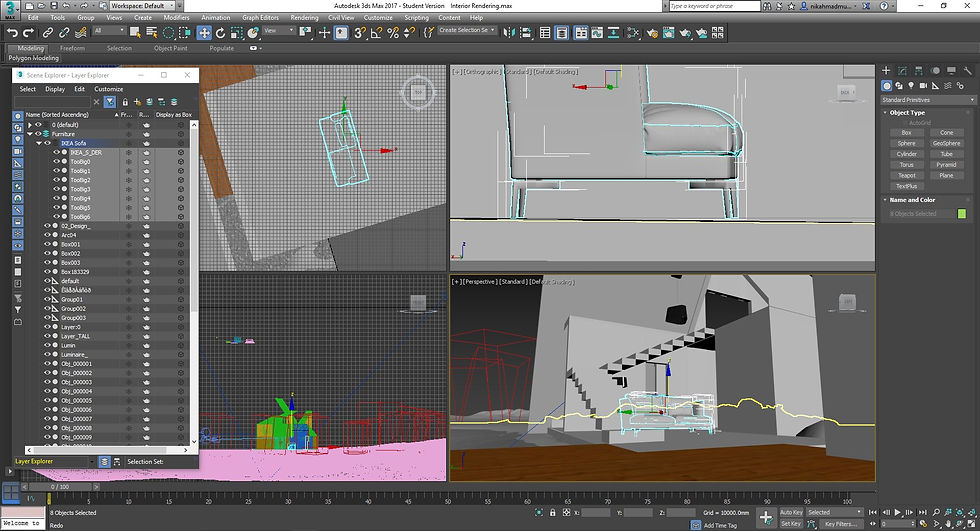
Fine tuning the position of the furnitures so that they do not float or submerge into the floor of the model. This step, although minor, is crucial to ensure that a scene looks realistic.
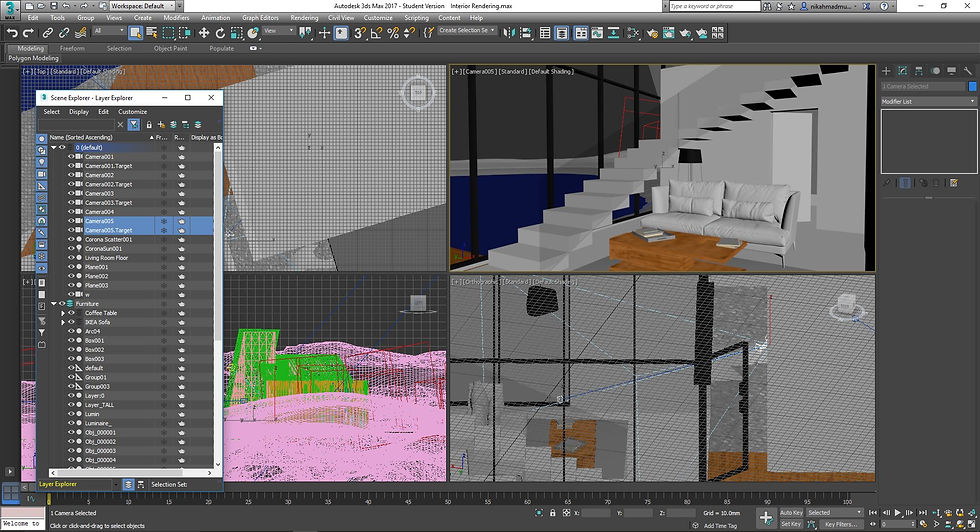
Via the Perspective viewport, adjust the angles and range of the interior scene to capture as much detail as possible without overwhelming the viewer. In this example, some window panes and frames need to be hidden to allow for appropriate camera positioning. Once final, the Perspective viewport is turned into a standard camera via the Create tab.
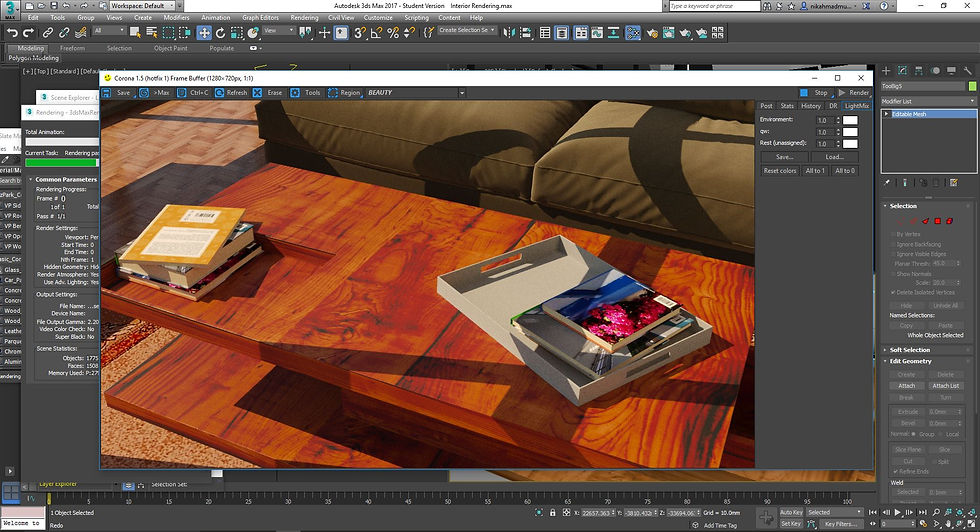
Even the smallest details in the scene are given a quick render to check for any errors.
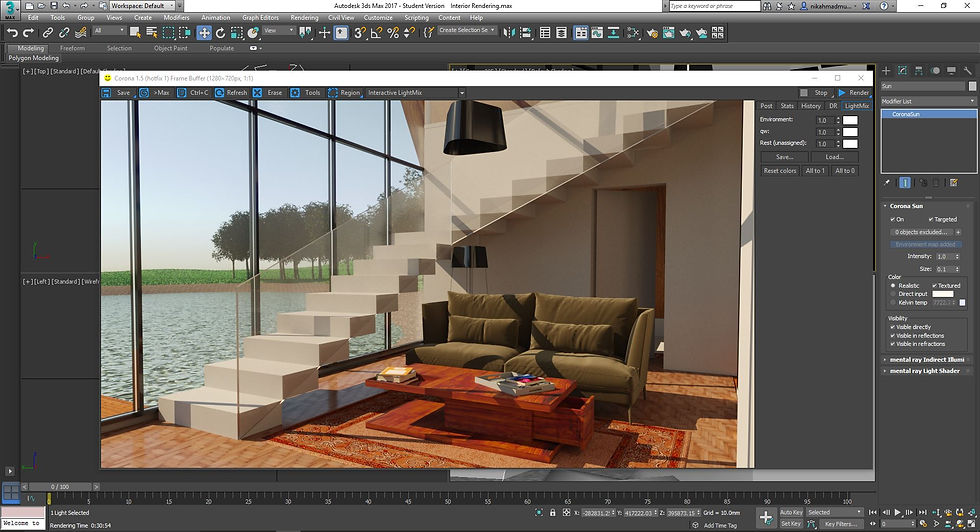
Before proceeding to add more furnitures, a test render of the newly set-up camera is done.
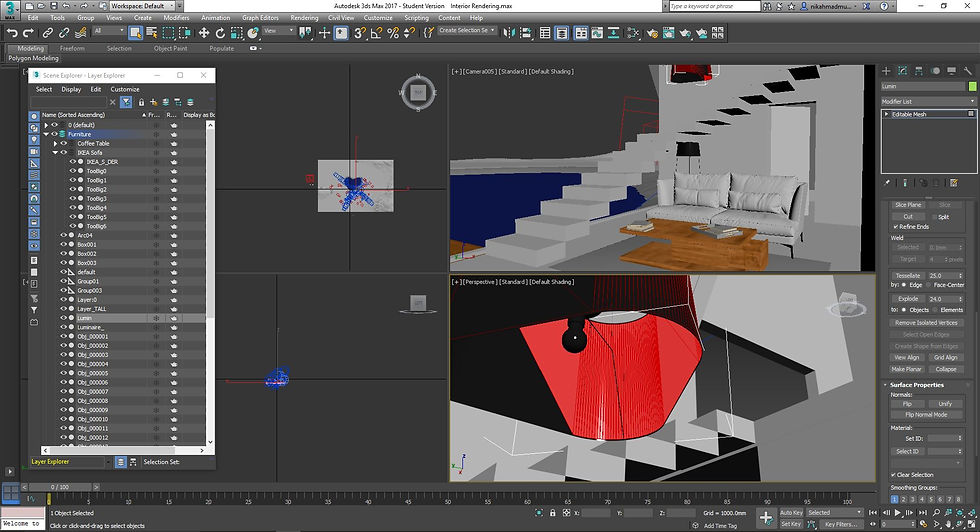
For some objects with a combination of different materials, multimaterial mapping is applied to the object to allow different materials to be applied to different material IDs. In this example, the inside surface of the lamp is changed to a reddish tone.
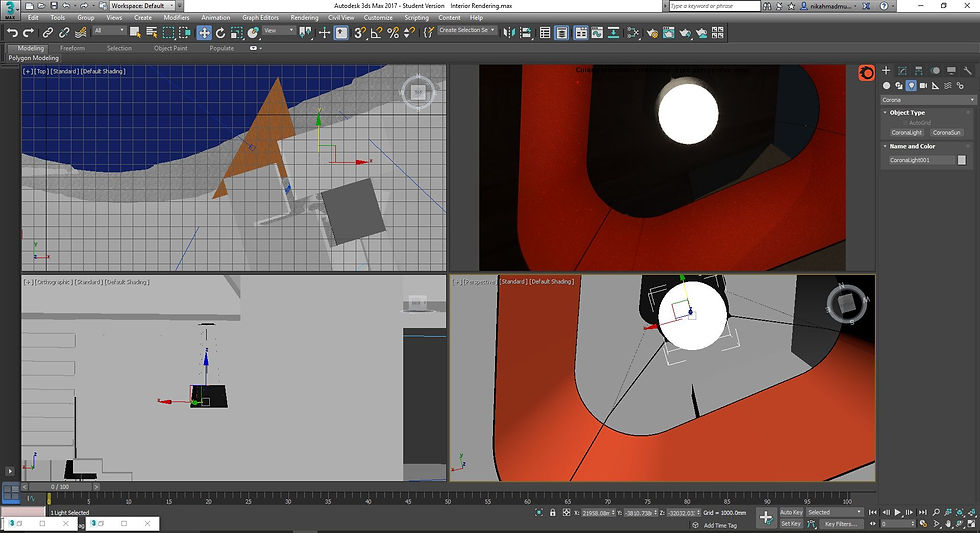
Lights are created by creating light object, in this case CoronaLight, inside the lamp shades. The intensity of the lights are appropriately configured. Corona light is used so that the lights can be adjusted even in post-rendering stage.
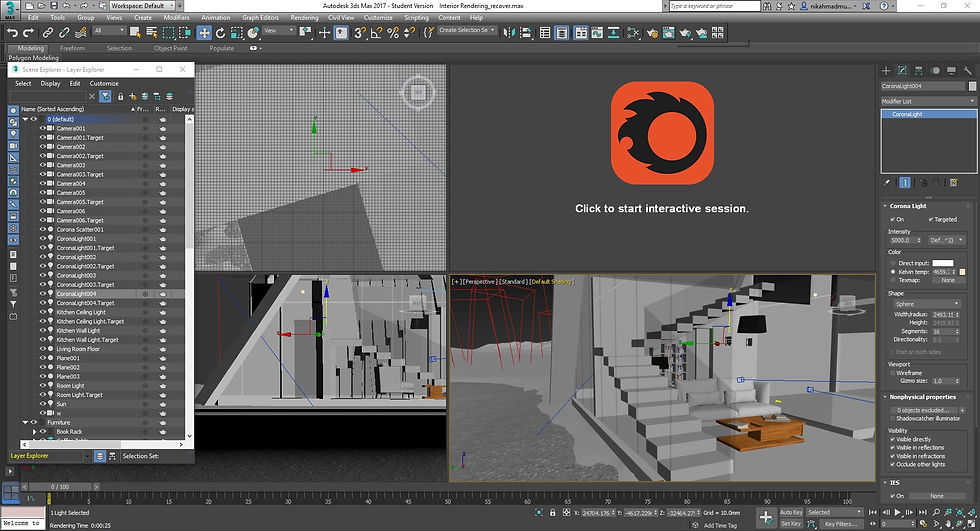
To ease the control of lighting in the scene, the light objects are appropriately sorted and labeled in the the layer manager.
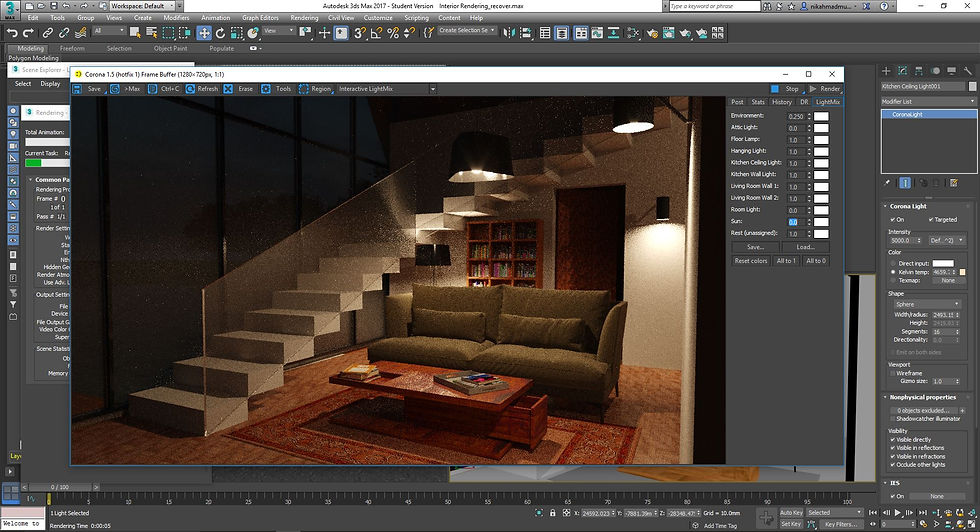
During and after rendering, each light can be controlled and adjusted individually using Corona's LightMix function.
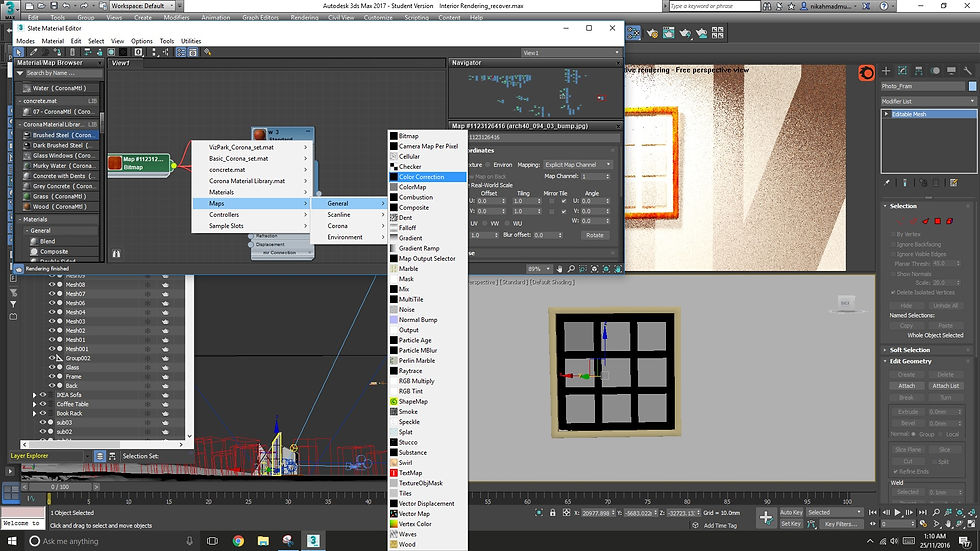
Color correction mapping is used in the material editor to ensure the material applied onto the furnitures remain realistic.
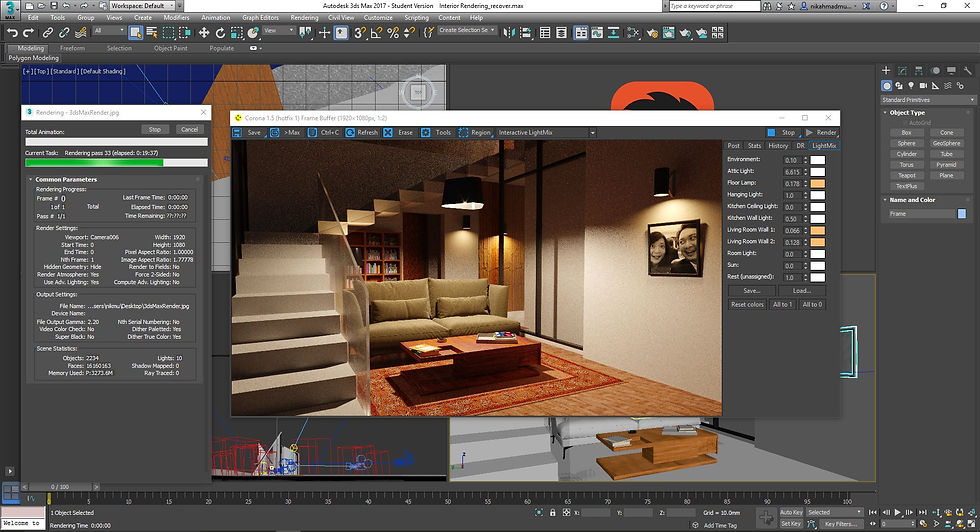
Once the lighting, material and placement of furnitures are confirmed, the first scene is rendered. The scene is set up to be a night scene to highlight the lighting in the space. Therefore, sunlight and environment light is lowered down to almost zero.
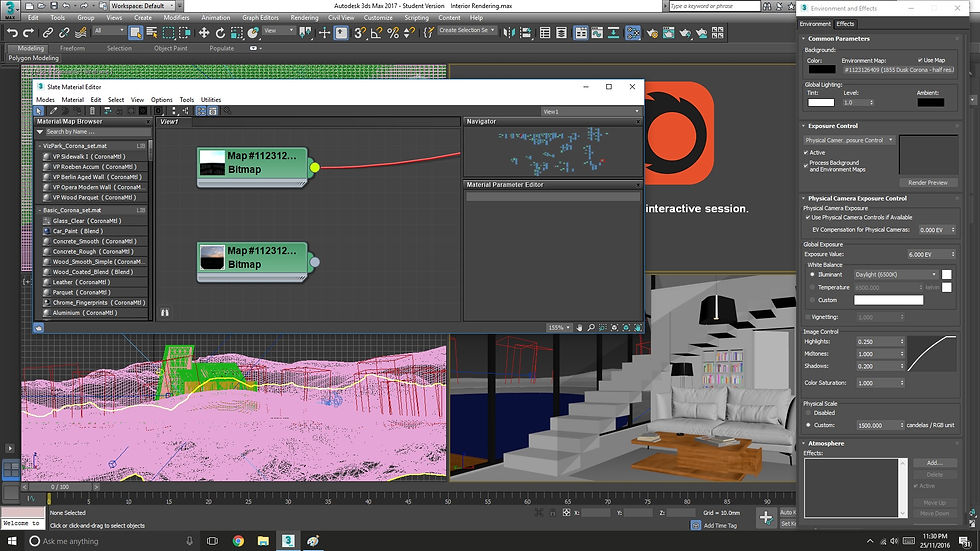
For the second scene (master bedroom shot), the environment is changed to a daylight environment and the sun intensity is increased to daylight intensity.

Once again, downloaded furniture objects are positioned and scaled appropriately inside the bedroom.
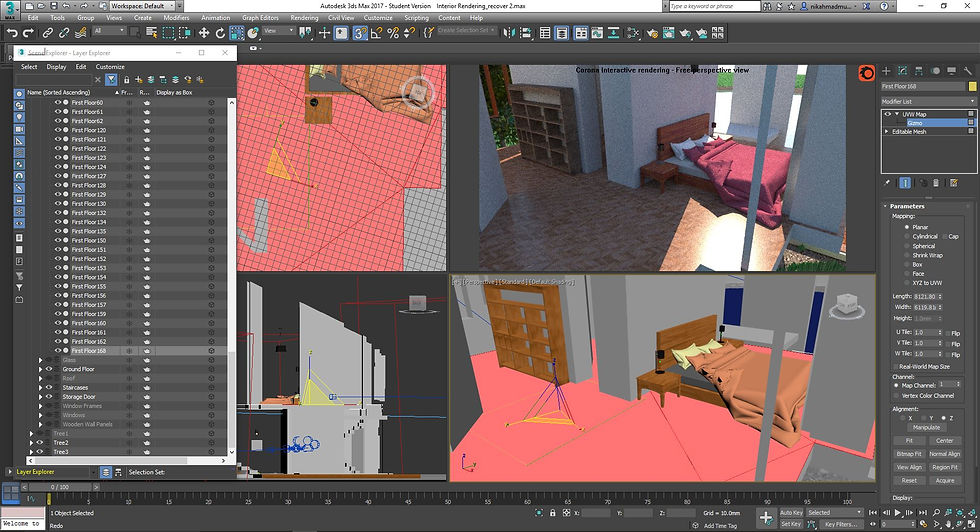
The bedroom floor is also textured using the same material as the living room floor. However, instead of creating a separate plane for the flooring, the top face of the floor slab is selected and multimaterial mapping is used to allow the flooring material to be applied to the material ID of the top face.
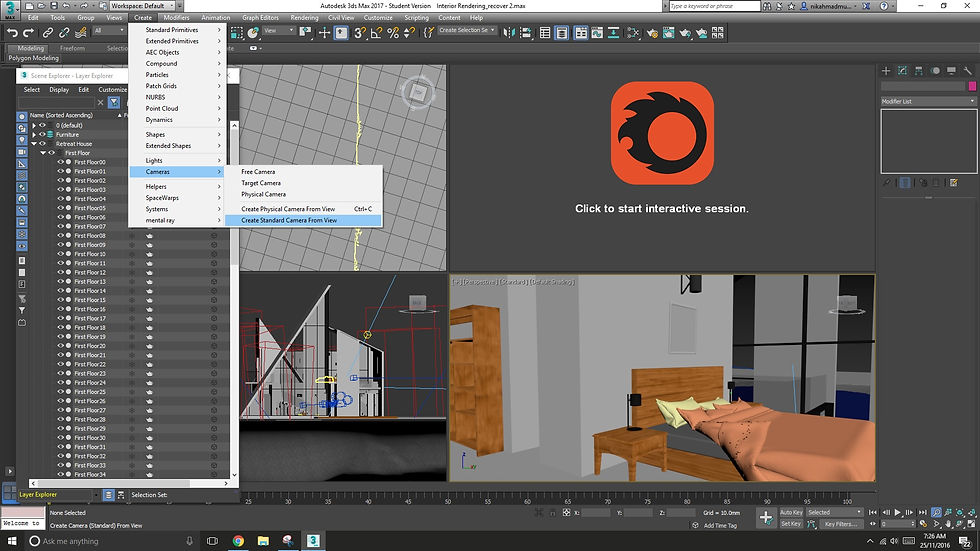
Once again, once a good angle is achieved in the Perspective viewport, the viewport is converted into a camera by using the Create Camera from Current View command.
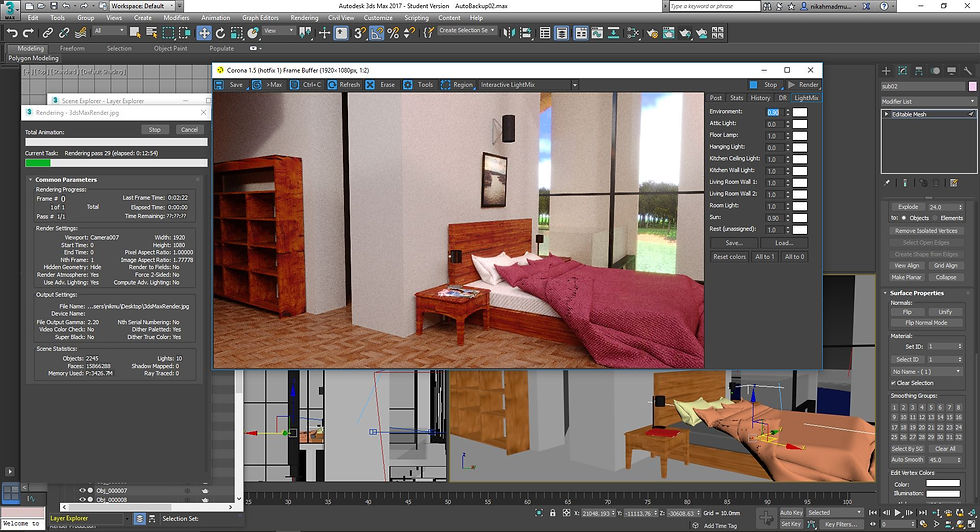
Scene 2 is rendered and left to go all the way to 500 passes, yielding a virtually noiseless and realistic scene.
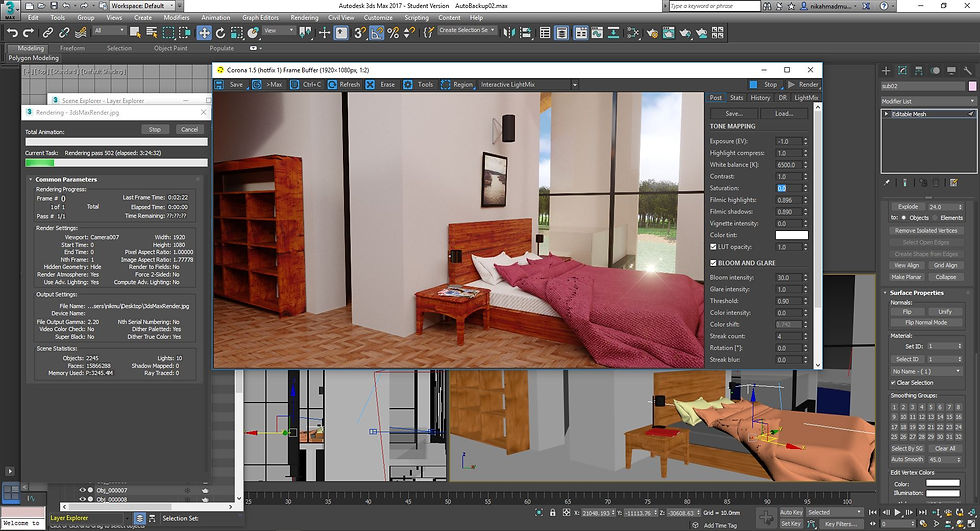
After 500 passes, the rendering is stopped and the rendered image is saved as a high quality JPEG, which gives a good balance between file compression and image quality.
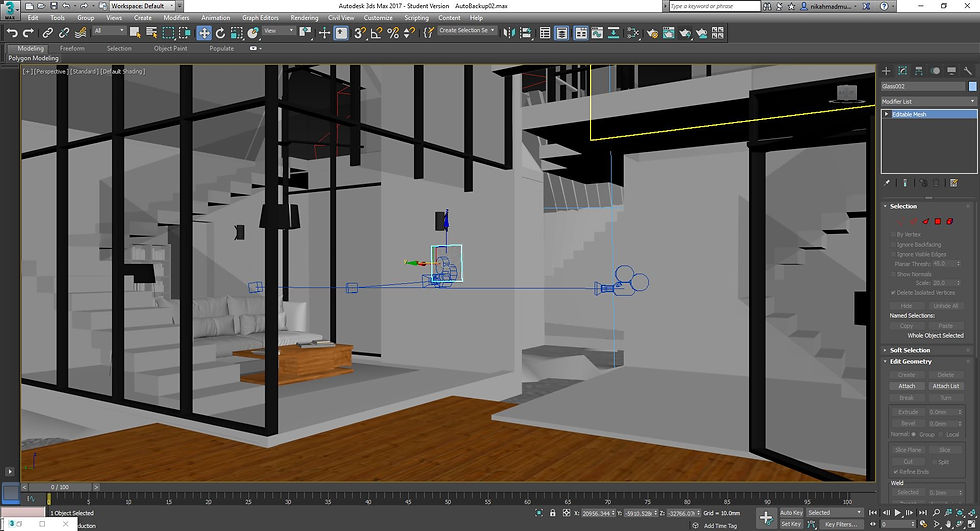
Returning to the living room to capture an additional angle to be rendered. Similarly, some window panes and frames are removed to allow the camera to capture an appropriate range of the scene.
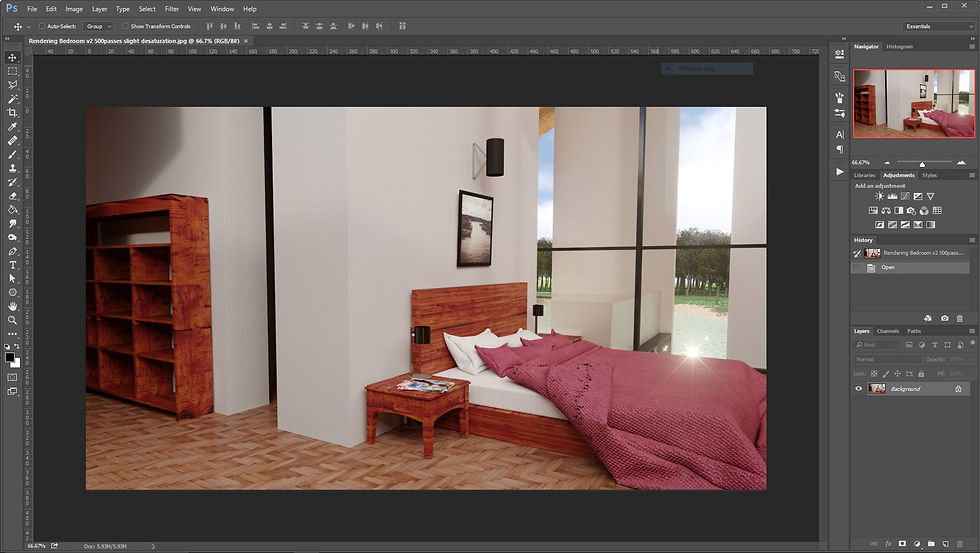
Once the renderings in 3DS Max are complete, two of the best rendered images are imported into Photoshop for post-processing.
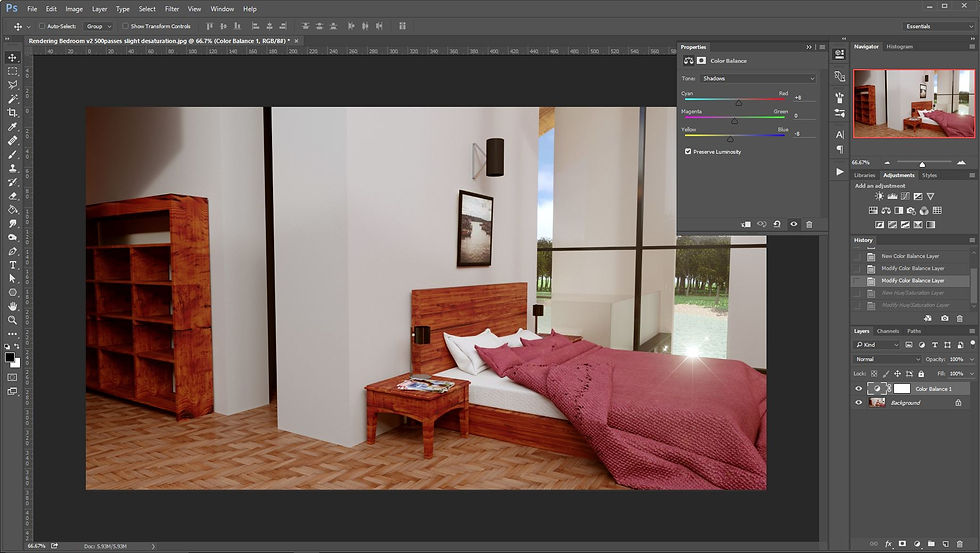
Color correction is applied to the rendered image to ensure a studio quality final image. In this instance, Color Balance is used to give a warmer color to shadows and a cooler shade for highlights. This yields a realistic image akin to a scene captured using a physical camera in a studio setup.
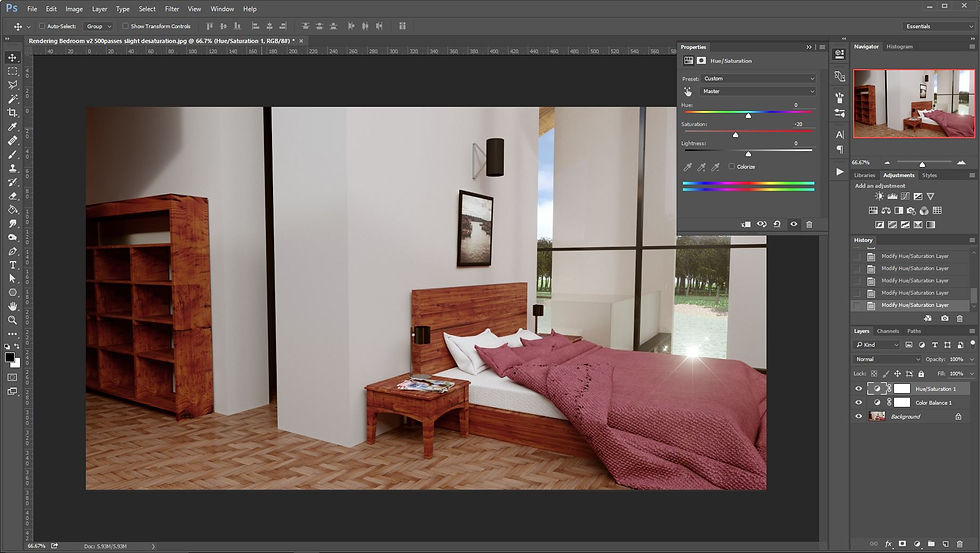
The image is desaturated to match the saturation of real-life environments.
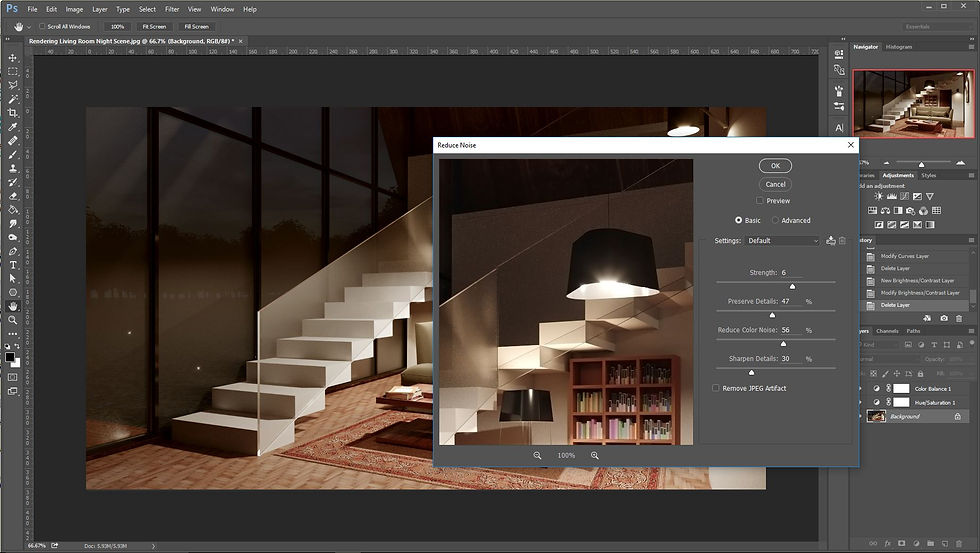
Noisy images are denoised in Photoshop by using the Reduce Noise filter. This is a faster way of removing noise, especially in scenes with lights, than by using any denoising methods in 3DS Max.
Interior Renderings
 |  |
|---|
Project 3
Project 3 requires students to produce a 90 second animation of the modeled building, which includes proper keyframing, assigning cameras to paths and splicing the clips into a full length video.
Progress Photos in 3DS Max and Adobe Premiere Pro
Click on the images to see detailed description
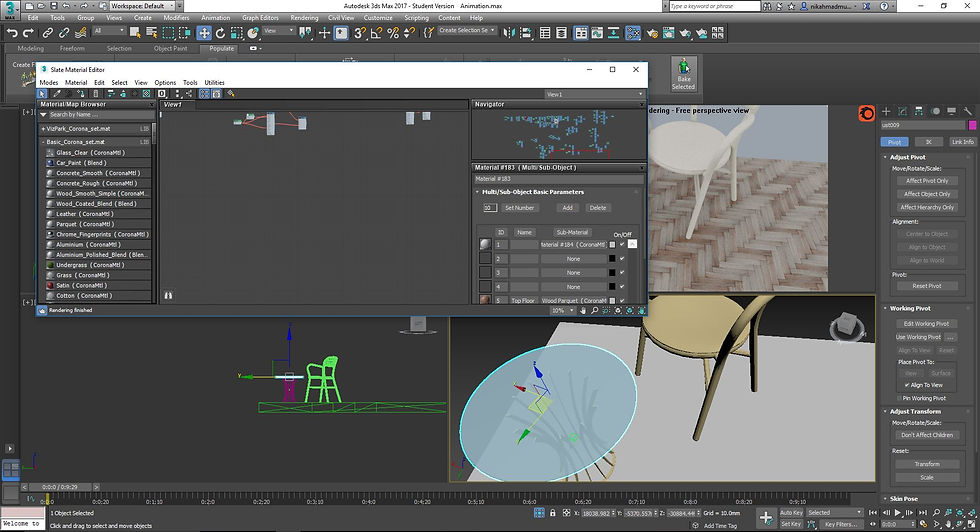
The house is further furnished with new furniture for spaces that were previously uncaptured. New materials were also created and applied to the furnishings.
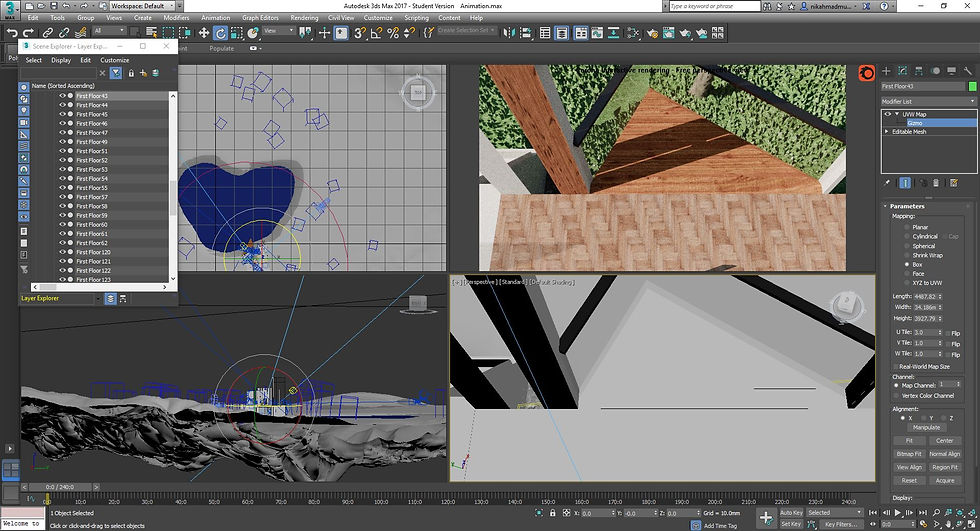
In some scenes previously not included in past projects, UVW mapping was applied for the floor and wall textures.
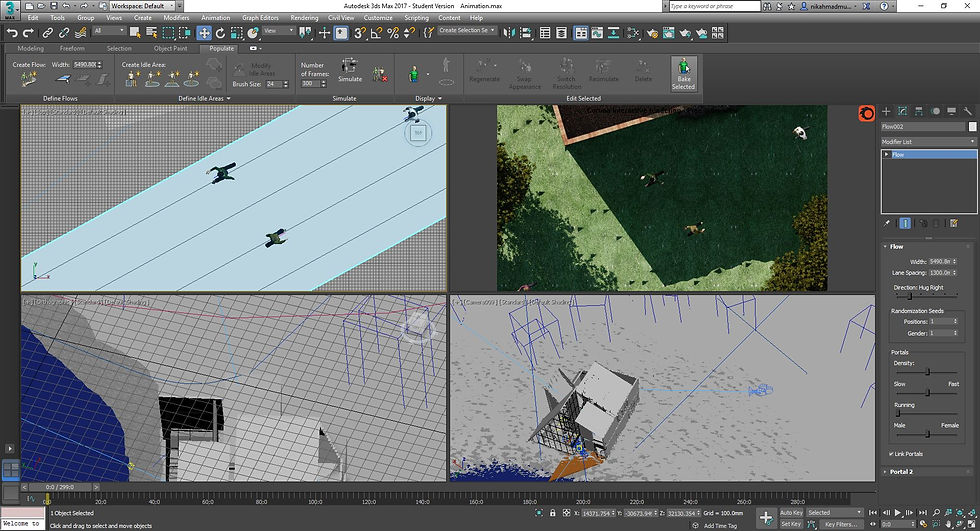
Human animation was added via the built in "Populate" tool. The tool generates decent-looking human figures that can be animated either walking through a path, or idling within a set radius.
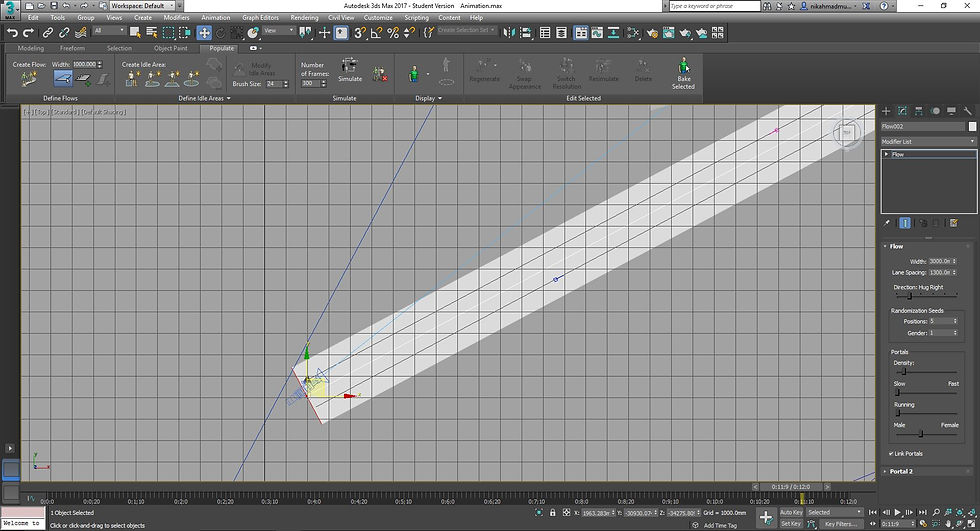
The flow of human animation is tweaked to ensure that it does not run into trees or the house.
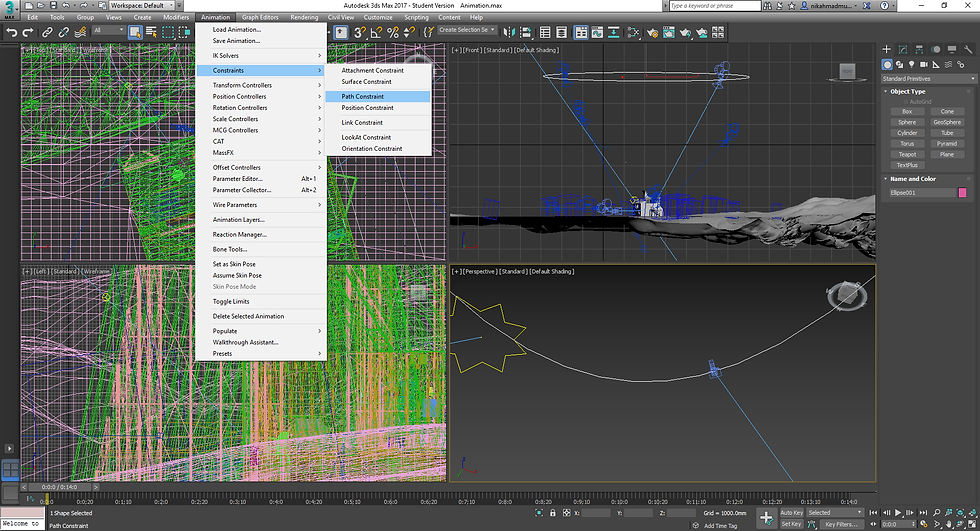
A path is created for the camera to follow. A camera is then constrained to move along the path.
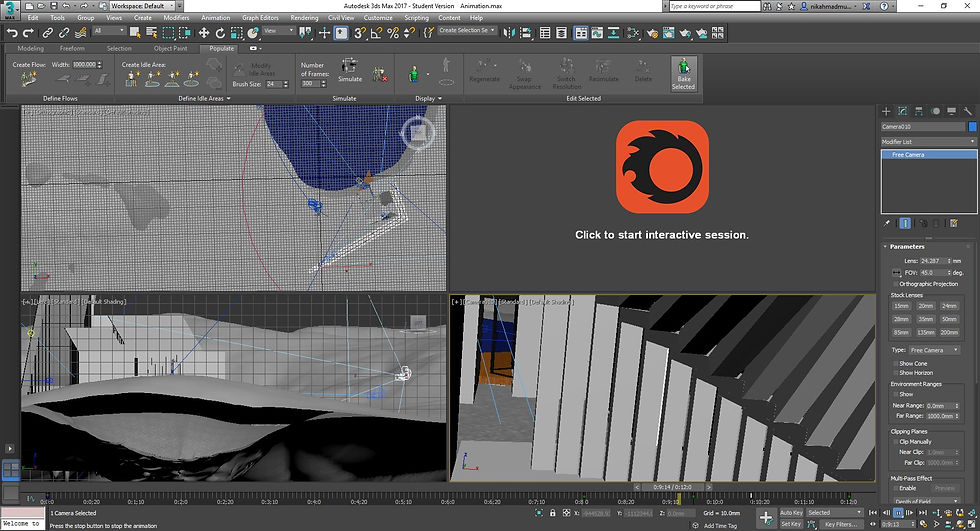
A key is set on a specific point in time for the start and end of the camera movement to control the speed.
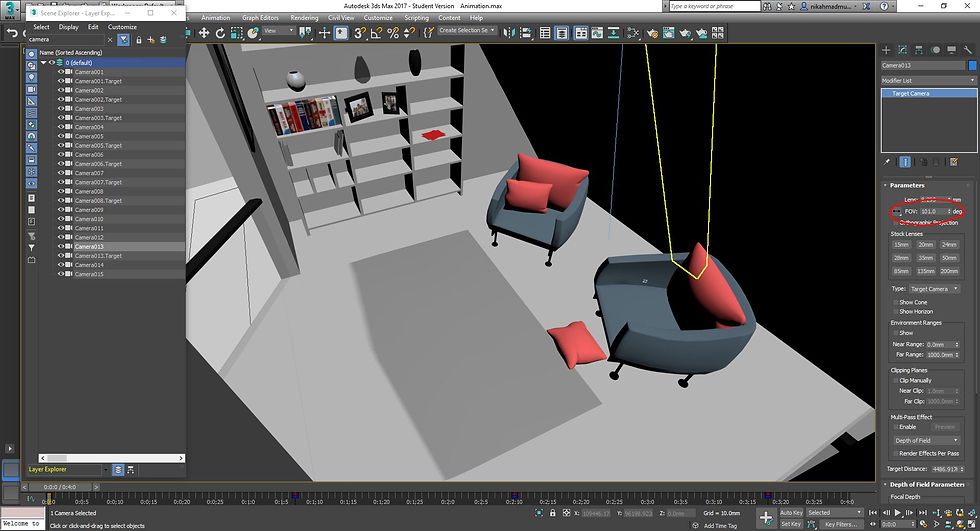
To simulate the field of view of a bird, the FOV amount is tweaked to achieve the wide field of birds' binocular vision.
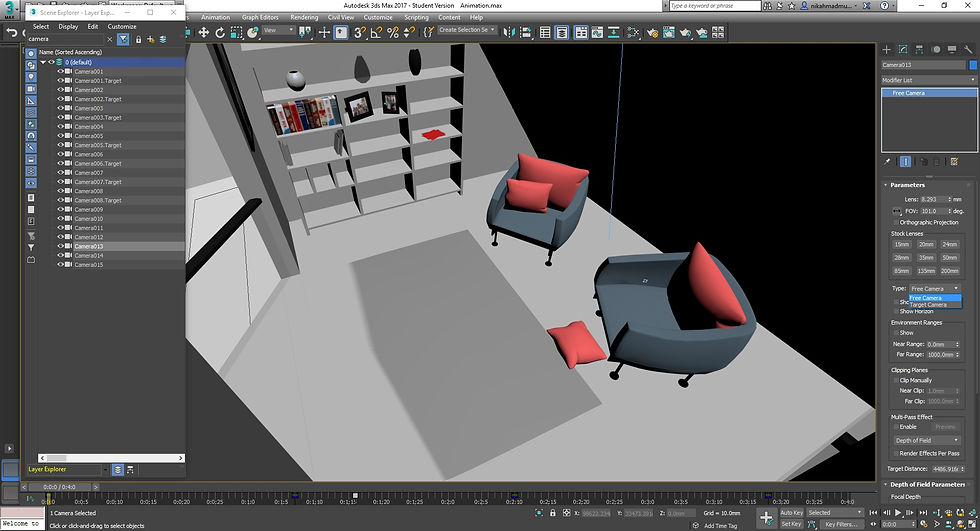
In some cases, the camera is changed to a free camera to allow for the animation of the swooping motion of a flying bird.
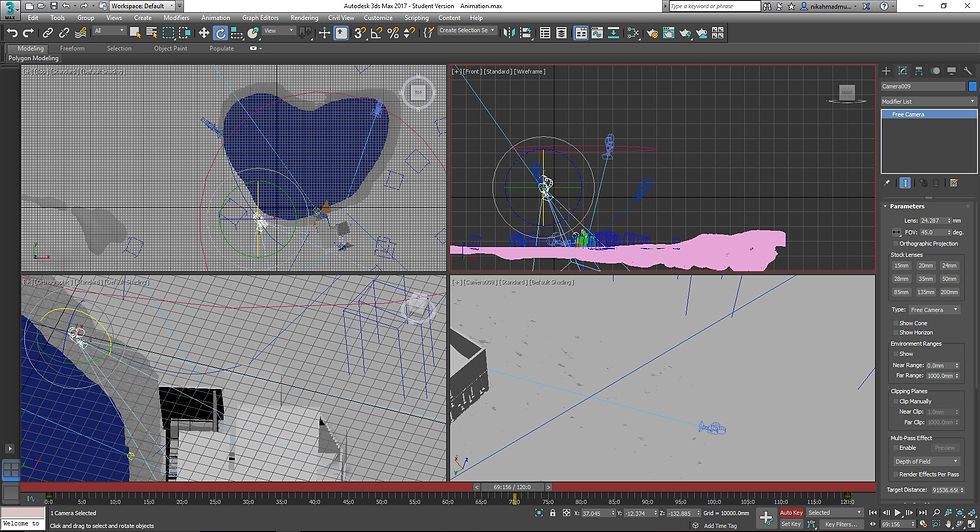
Auto Key and Set Key are used extensively for each change in movement to mimic the view of a bird.
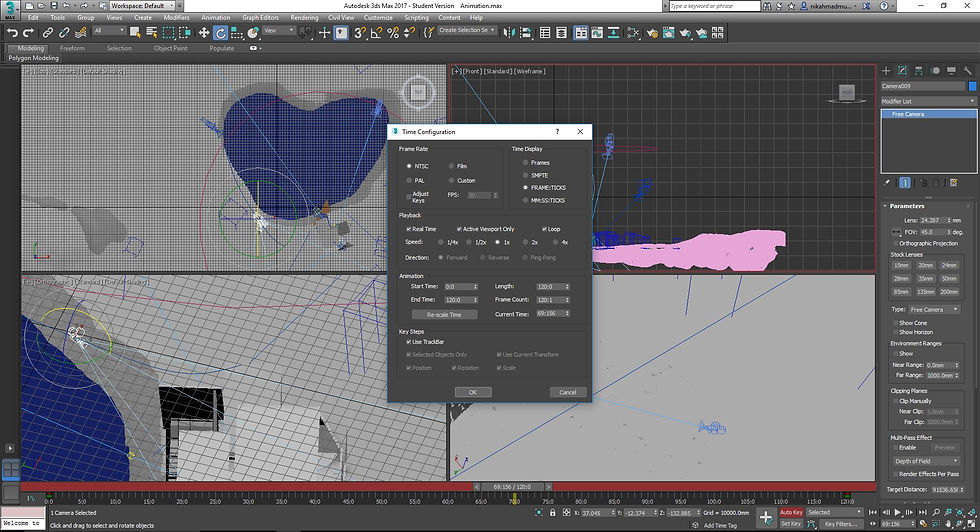
Proper time configuration, coupled with perfect keyframe timing is essential to attain the correct speed and motion. Note that none of the rendered animations were slowed down in the final video. They remain at 30fps.
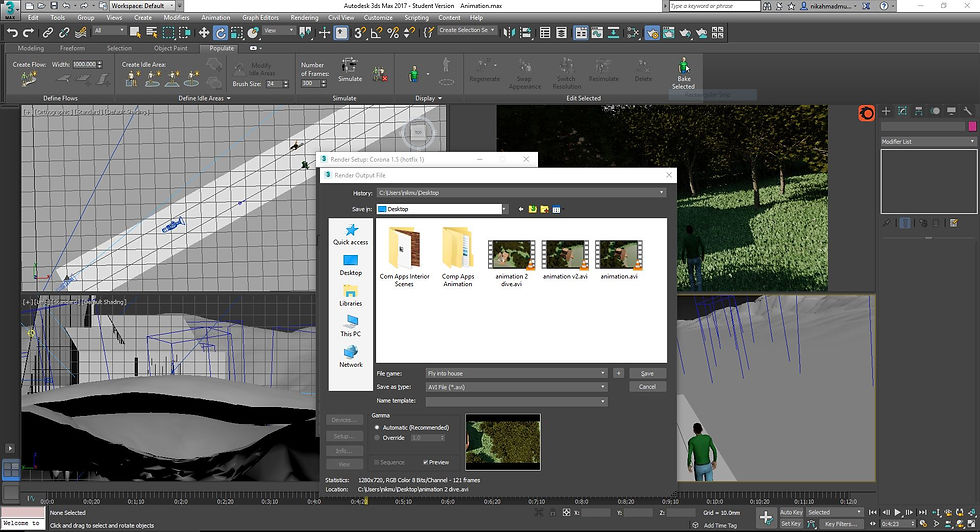
A save directory and unique filenames were created for each rendering.
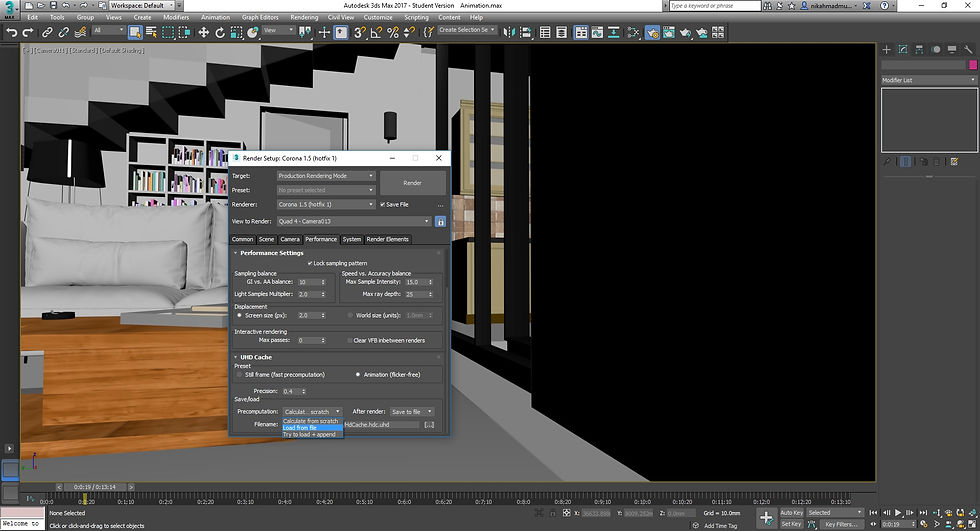
Similar to the "Reuse FG" method in NVidia Mental Ray, UHD Cache can be saved and reused in Corona as a time-saving trick.
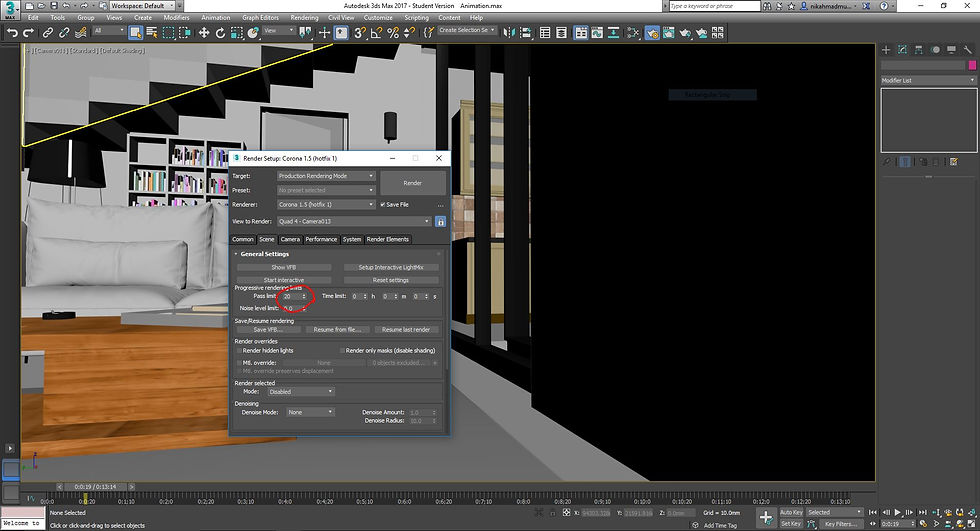
Due to Corona's nature of being a progressive renderer, a pass limit is set for each frame to stop the rendering for the frame at a set number to move on to the next. Due consideration is given to the balance between quality and speed of rendering.
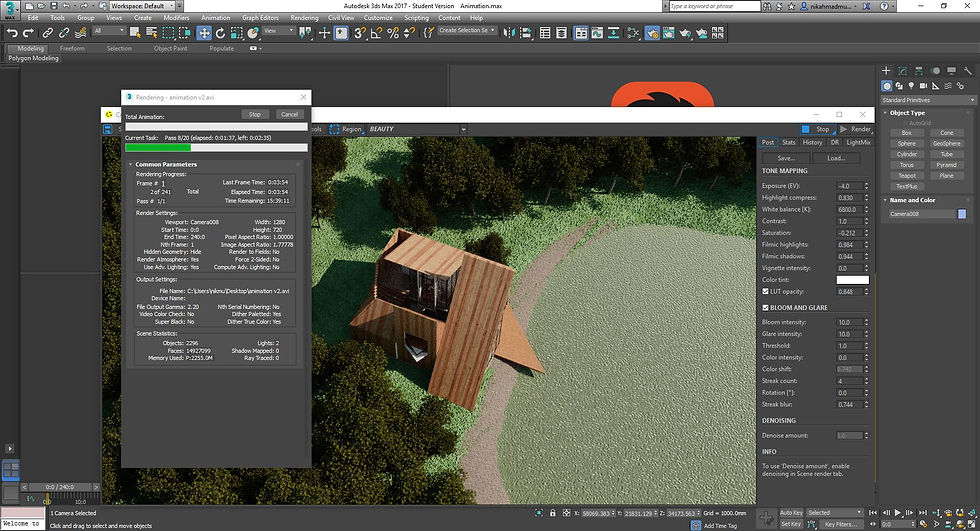
Rendering of the first scene, bird's eye view of the Retreat House following a set path.
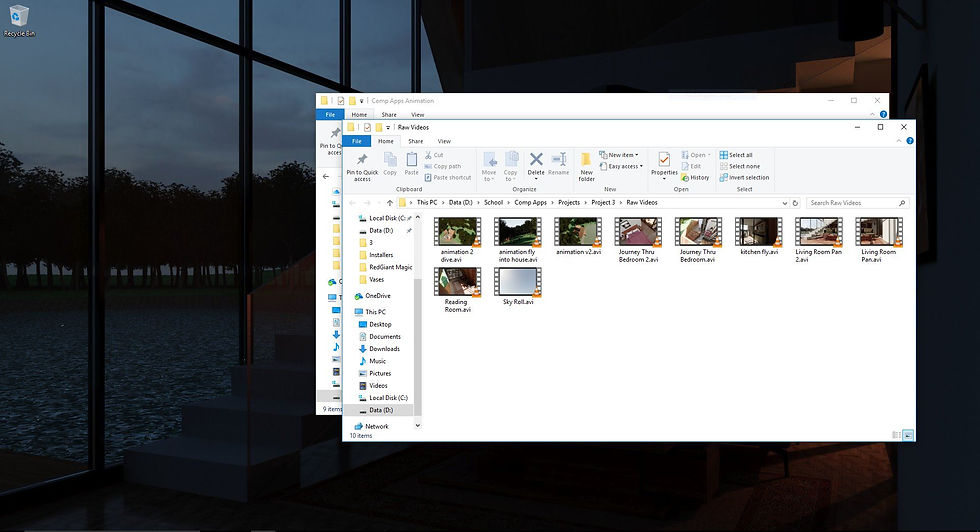
Rendered animations are compiled into a folder, ready for splicing and editing in Adobe Premiere Pro.
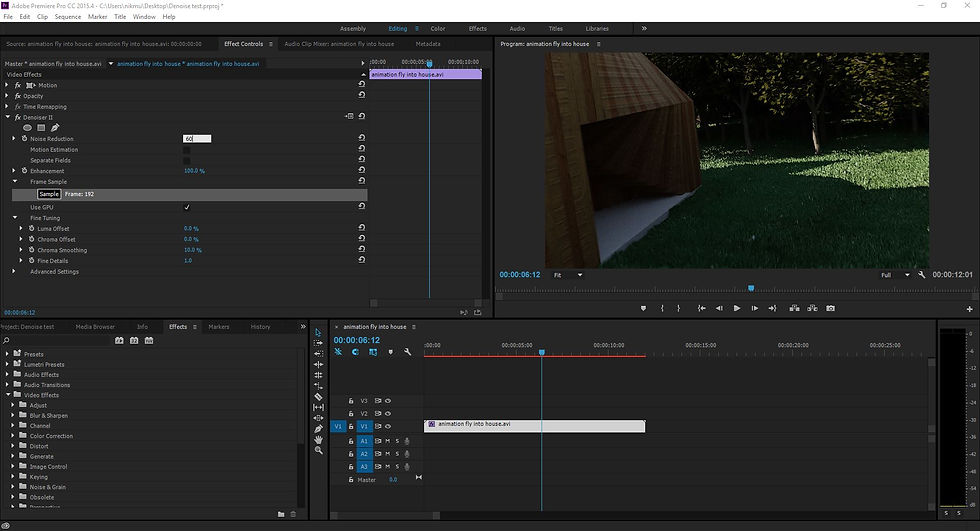
First step, even before composing the animation, is to denoise all clips to balance out the level of details vs the amount of noise in the video.
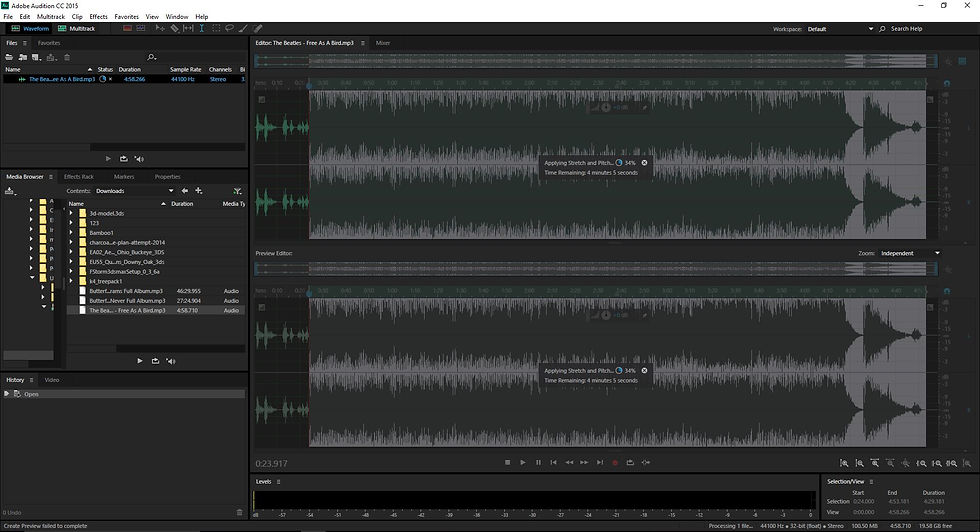
The background music for the animation is prepped and edited using Adobe Audition. Modifications include change in pitch, tempo and arrangement.
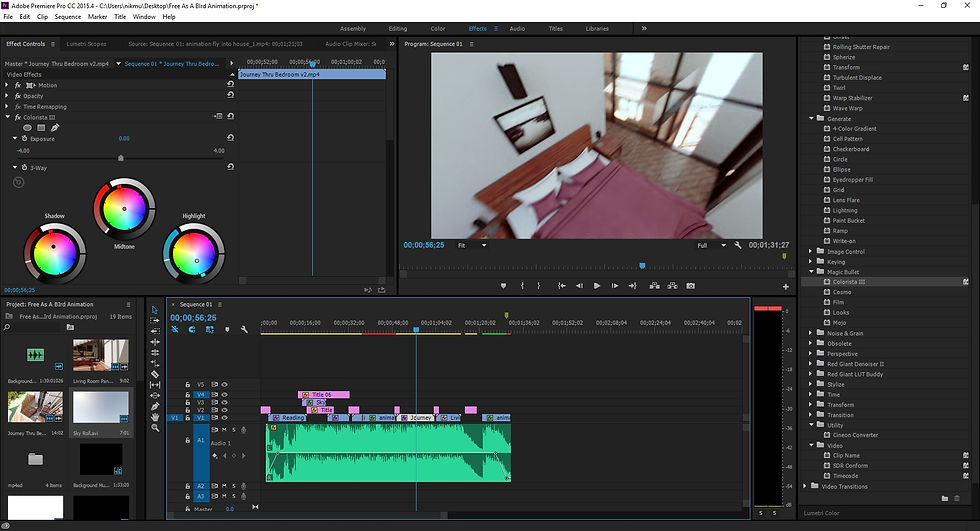
Once all clips and transitions have been spliced and placed accurately according to the desired timing, color grading is applied to each clip to ensure that all clips adhere to the same color "mood".
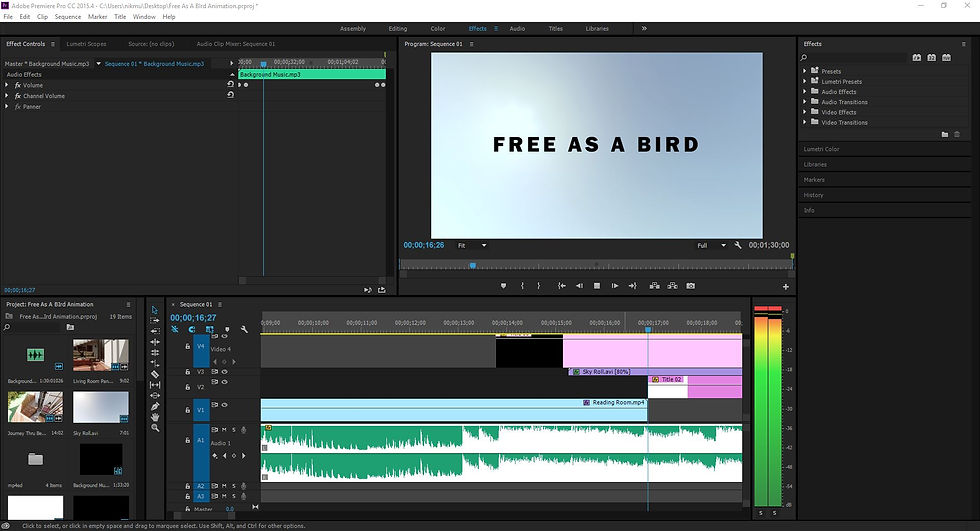
The title and other texts are added in, also with due consideration to the timing, in/out fades and font style.
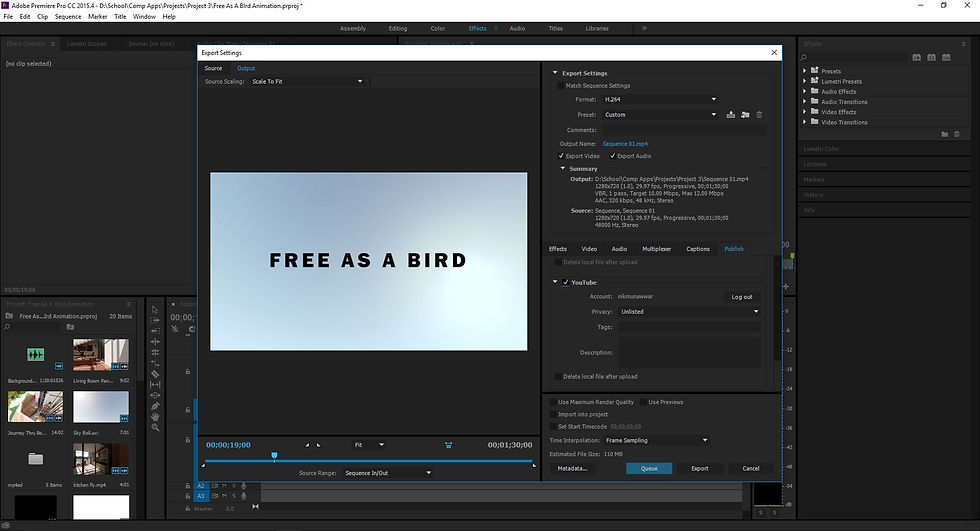
Adobe Premier Pro allows for automatic upload to Youtube during export. The account is linked to the program and uploading is seamless.
Animation
Reflections
Content loading...
Taylor's Graduate Capabilities

